> ## Documentation Index
> Fetch the complete documentation index at: https://docs.qtap.qa/llms.txt
> Use this file to discover all available pages before exploring further.
# Birthday Campaigns
> How to set up a campaign that automatically sends a birthday reward to members.
A Birthday Rewards campaign sends a notification to members on or before their birthday, optionally with a reward attached. Qtap triggers it automatically once per year for each member who has a birthday in their profile.
## Requirements
For a member to receive a birthday campaign, they must have a birthday date saved in their Qtap account. Members set this themselves in the app. You can also add or edit a member's birthday from their profile in the dashboard — go to **Members**, open the member's profile, and click **Edit Info**.
Members without a birthday on file will not receive the campaign.
## Creating a Birthday Campaign
Click **Campaigns** in the left sidebar, then click **New Campaign**. The wizard walks you through these steps:
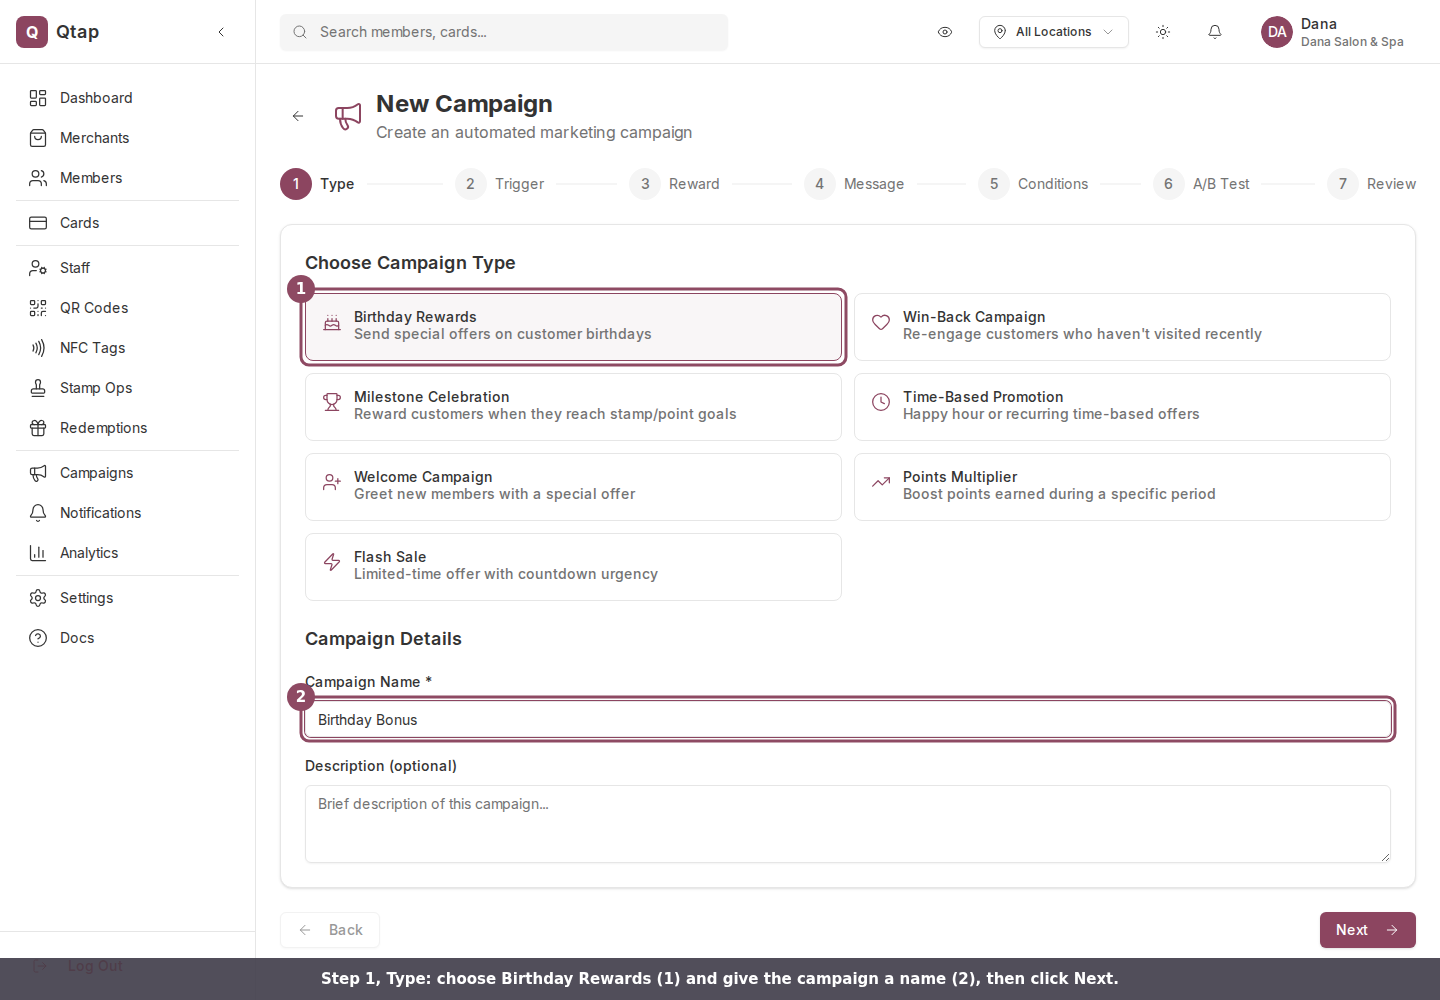
1. On the Type step, select **Birthday Rewards**. Give the campaign a name (e.g., "Birthday Bonus") and an optional description. Click **Next**.
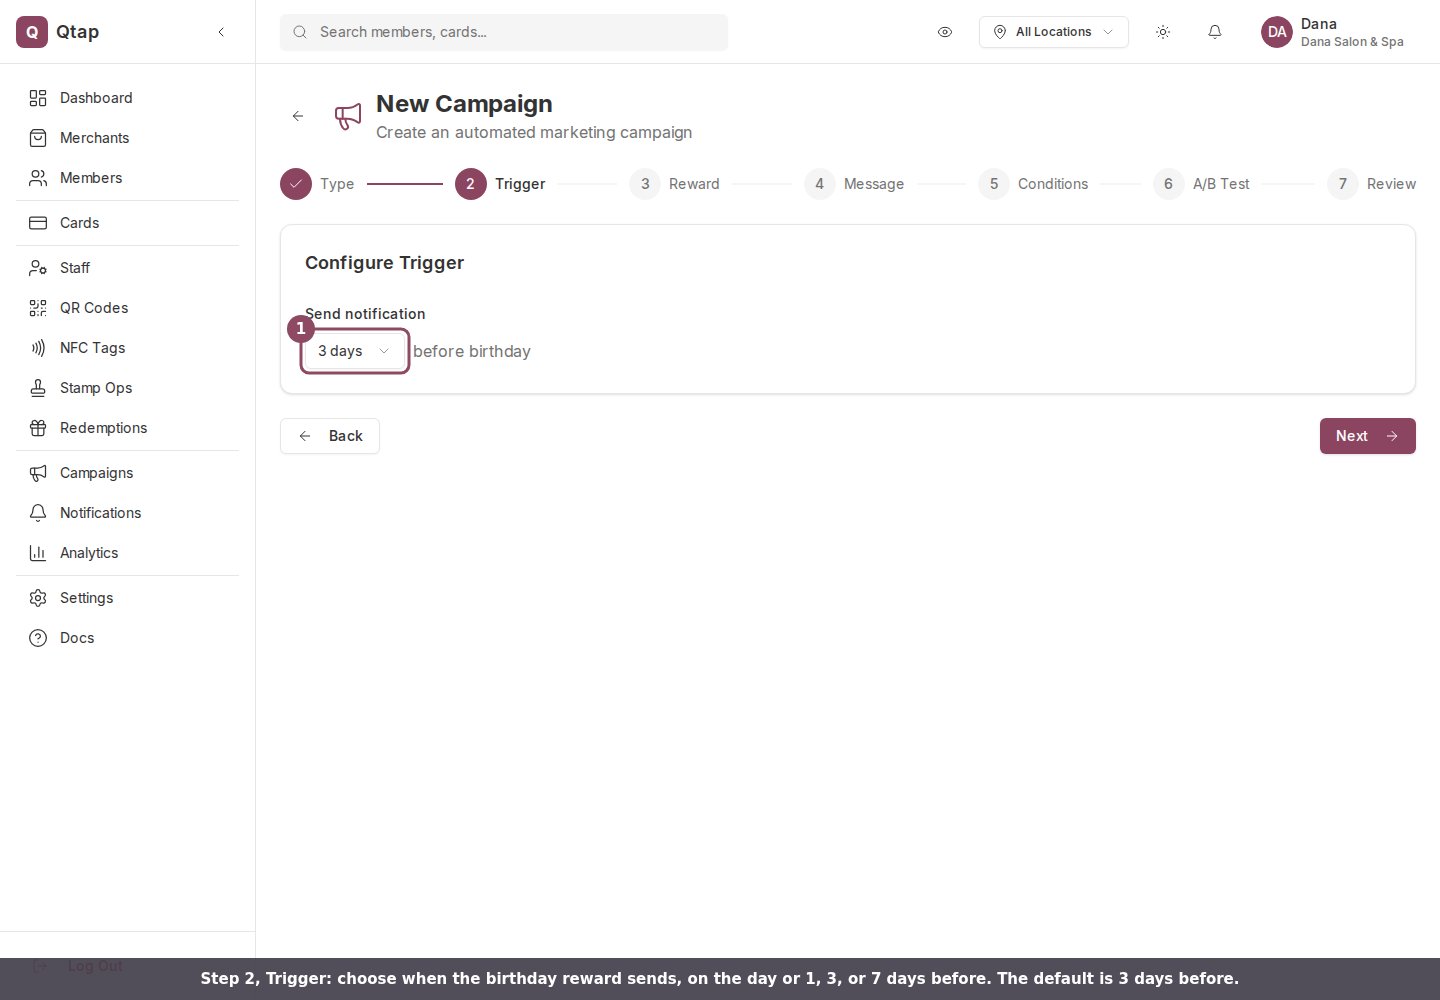
2. On the Trigger step, choose when to send the notification: on the day, 1 day before, 3 days before (default), or 7 days before. If you're attaching a reward, sending 3 days early gives members time to plan a visit. Click **Next**.
3. On the Reward step, optionally attach a reward. Members receive it in their wallet when the notification sends. Available types include bonus stamps, a points top-up, or a custom voucher. Click **Next** whether you add a reward or not.
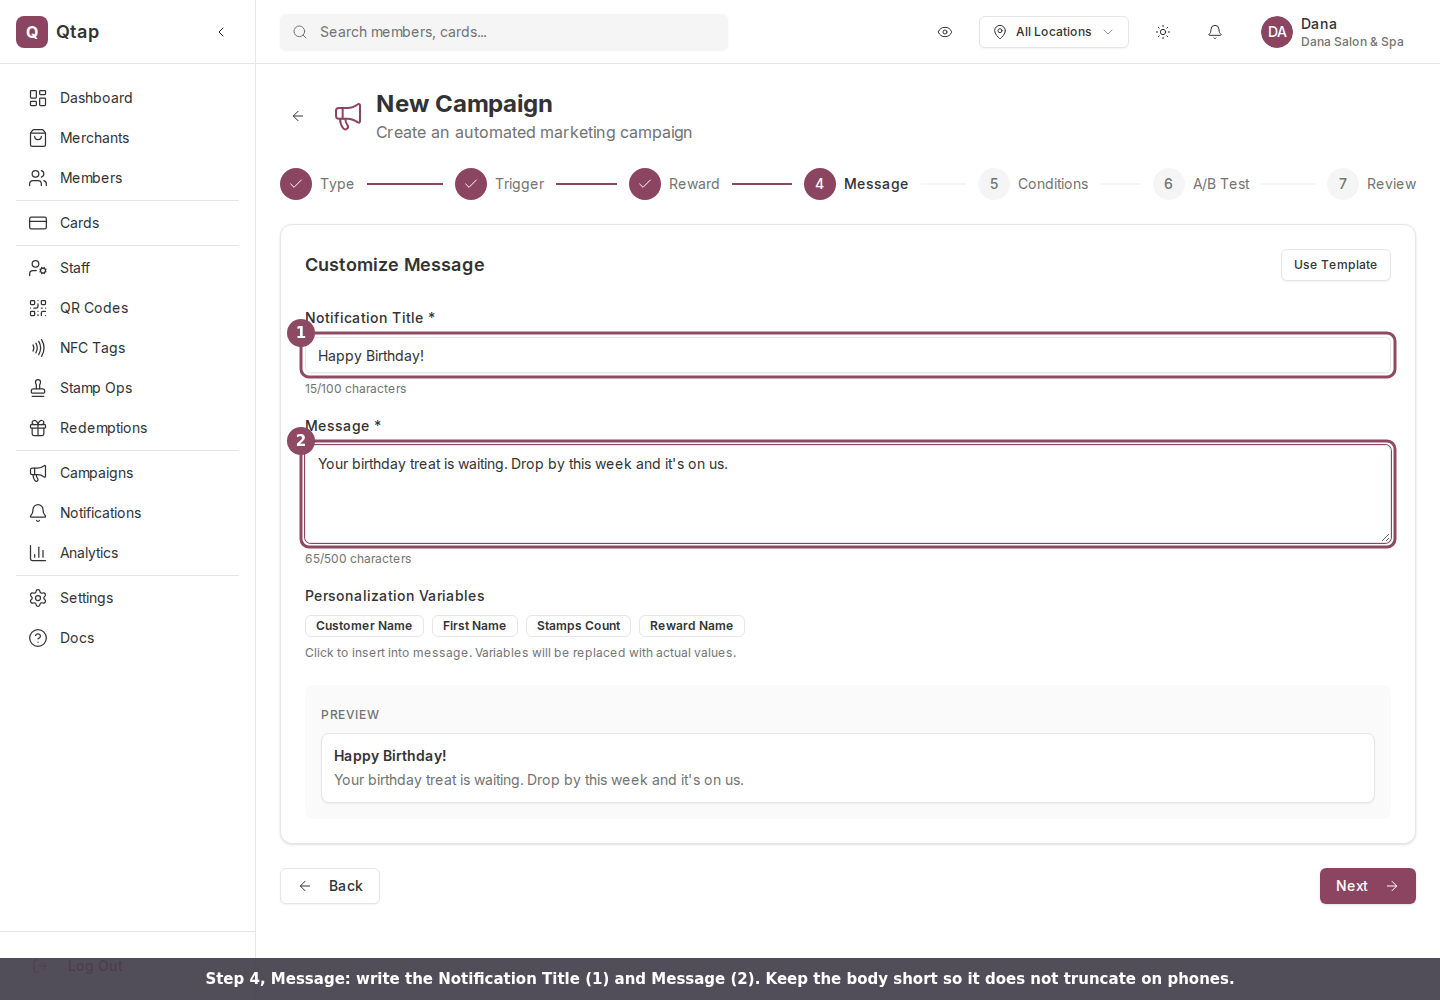
4. On the Message step, fill in the **Notification Title** (e.g., "Happy Birthday!") and the **Notification Body** (e.g., "You've got a free coffee waiting for you this week."). Keep the body short — push notifications truncate long text on most phones. Click **Next**.
5. On the Conditions step, optionally narrow who receives the campaign — for example, only members who have visited in the last 90 days. Leave this blank to target all members with a birthday on file. Click **Next**.
6. On the A/B Test step, optionally set up two message variants to test which performs better. Click **Next**.
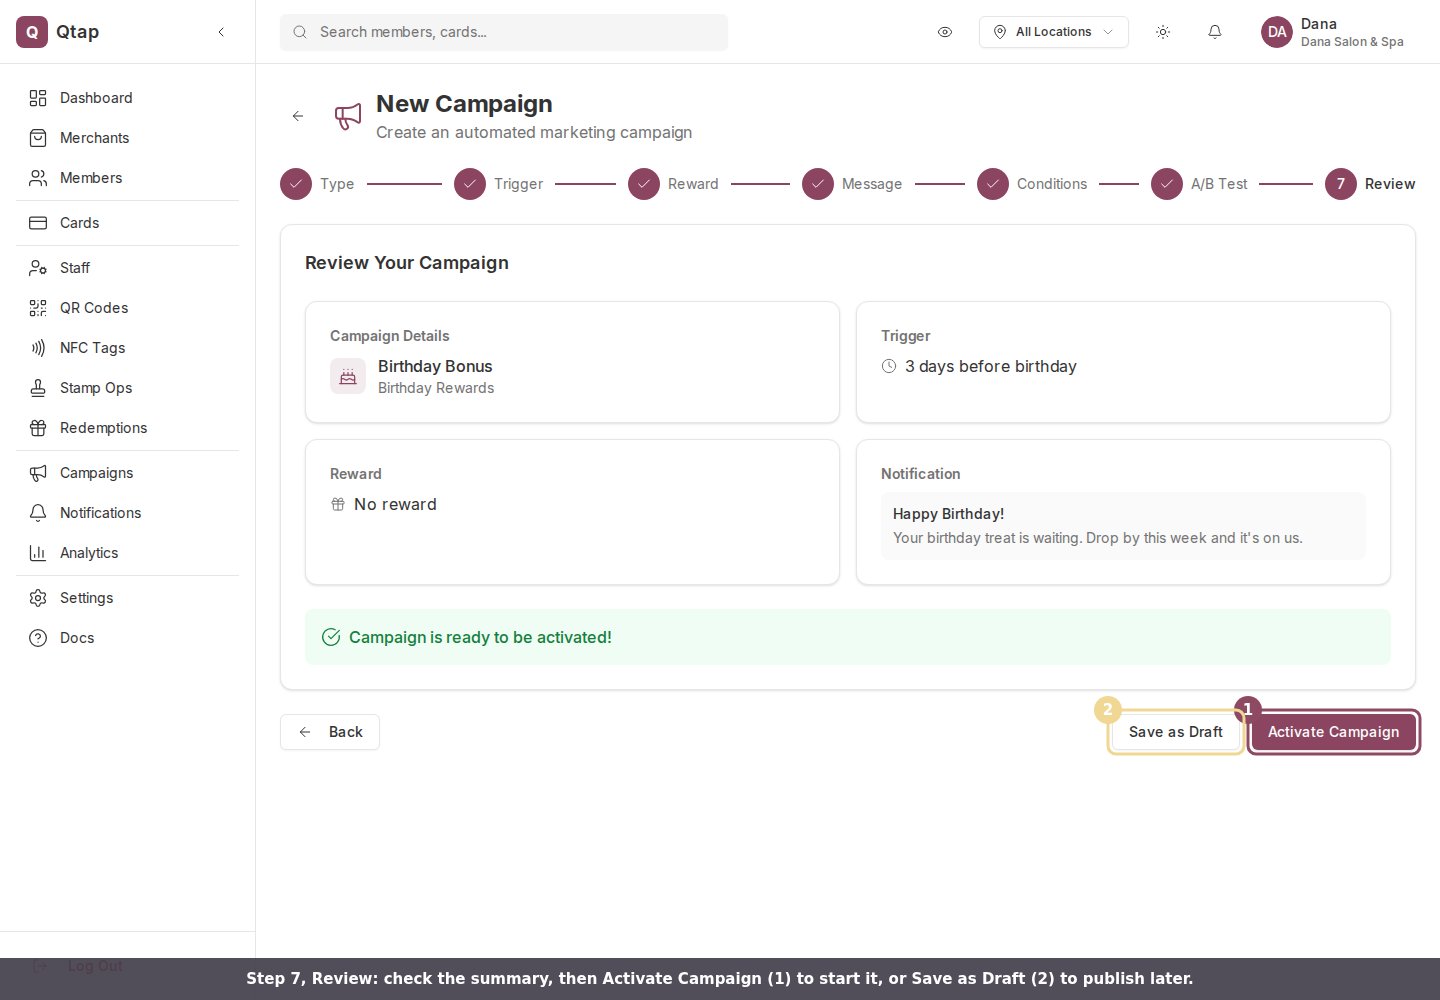
7. On the Review step, check the summary and click **Activate** to start the campaign, or **Save as Draft** to publish it later.
 Once a birthday campaign is active, it runs every year automatically. You do not need to re-create it each year.
## Managing the Campaign
After activating, the campaign appears on the Campaigns page with a status of **Active**. Click the three-dot menu on the campaign card to:
* **Pause** — stops future sends without deleting the campaign
* **Edit** — change the trigger timing, reward, or message
* **Delete** — removes the campaign permanently
Pausing a campaign mid-year does not cancel birthday notifications that have already been queued for that day. Members whose birthday falls on the day you pause may still receive the message.
All campaign types and how campaigns work in Qtap
Re-engage members who haven't visited in a while
How to view and edit member birthday information
Once a birthday campaign is active, it runs every year automatically. You do not need to re-create it each year.
## Managing the Campaign
After activating, the campaign appears on the Campaigns page with a status of **Active**. Click the three-dot menu on the campaign card to:
* **Pause** — stops future sends without deleting the campaign
* **Edit** — change the trigger timing, reward, or message
* **Delete** — removes the campaign permanently
Pausing a campaign mid-year does not cancel birthday notifications that have already been queued for that day. Members whose birthday falls on the day you pause may still receive the message.
All campaign types and how campaigns work in Qtap
Re-engage members who haven't visited in a while
How to view and edit member birthday information