> ## Documentation Index
> Fetch the complete documentation index at: https://docs.qtap.qa/llms.txt
> Use this file to discover all available pages before exploring further.
# Your First Loyalty Program
> How to set up a stamp card or points program for your customers in Qtap.
Qtap runs two types of loyalty programs: stamp cards and points programs. Stamp cards reward customers after a set number of visits. Points programs reward customers based on how much they spend. This page walks you through setting up a stamp card, which is the fastest way to get started.
## Before You Begin
Make sure you have at least one location set up in your account. When you create a stamp card, you assign it to one or more locations. If you have no locations yet, go to **Settings > Locations** and add one first.
## Create Your First Stamp Card
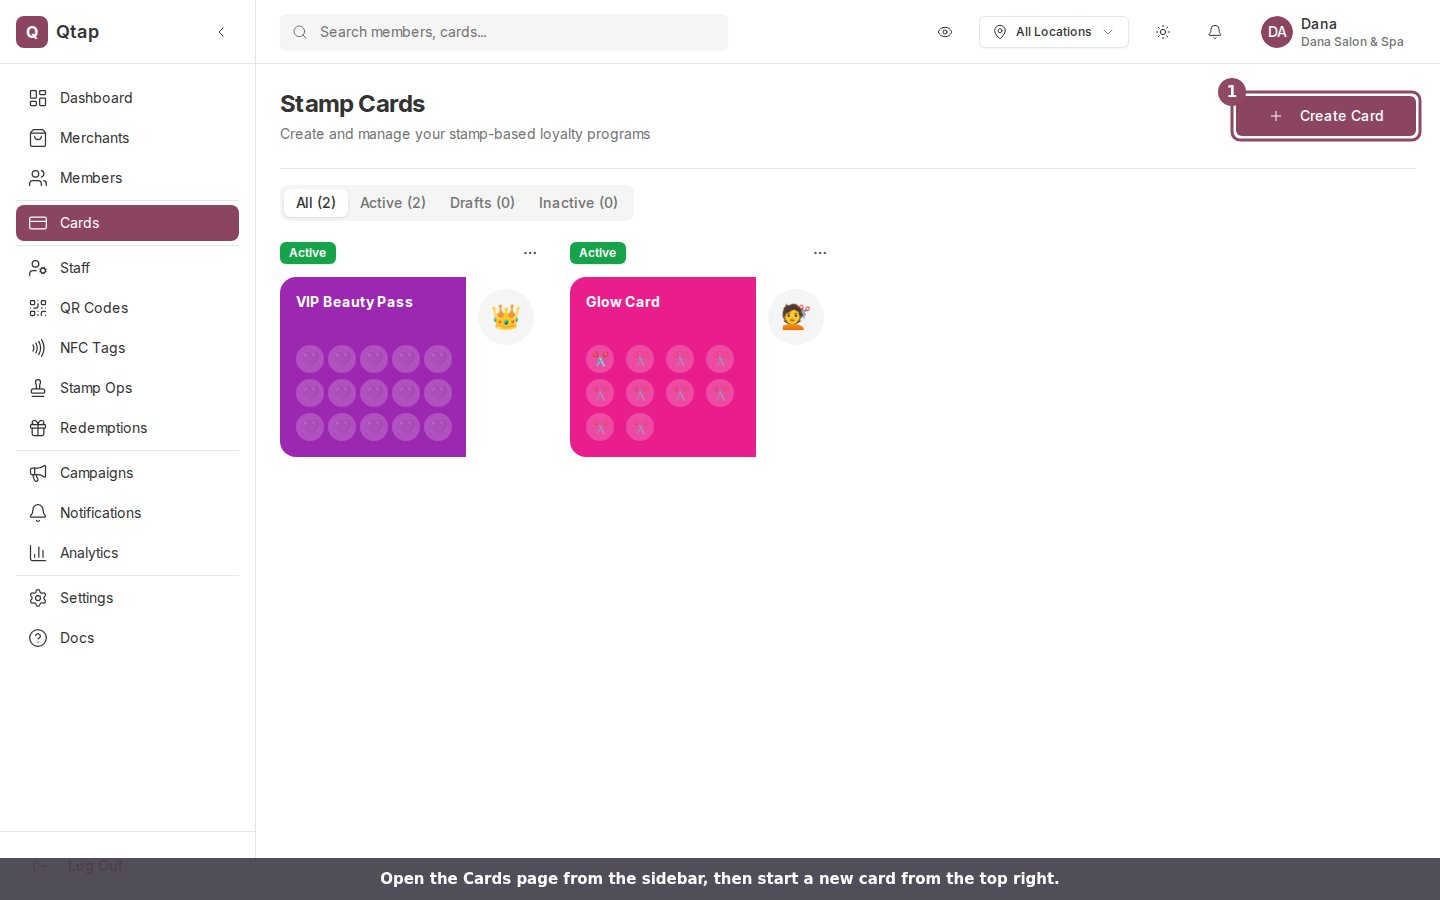
Click **Cards** in the left sidebar, then click **New Card** in the top right corner. The wizard has four steps:
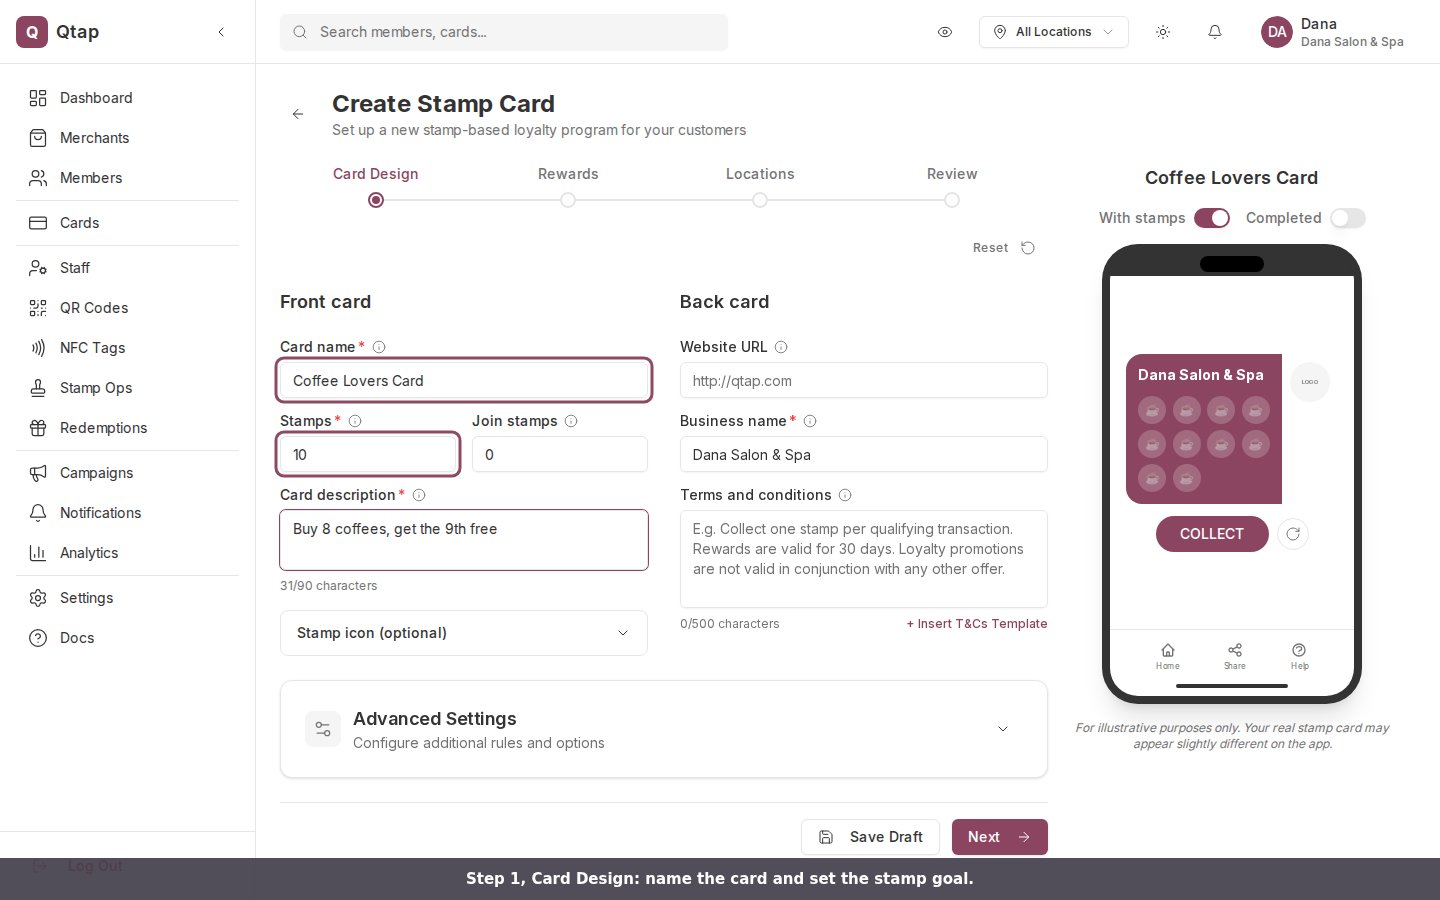
 **1. Card Design** — Fill in the card name, description, stamp goal, business name, card color, and stamp icon. The name is what customers see in the app. Click **Next** when done.
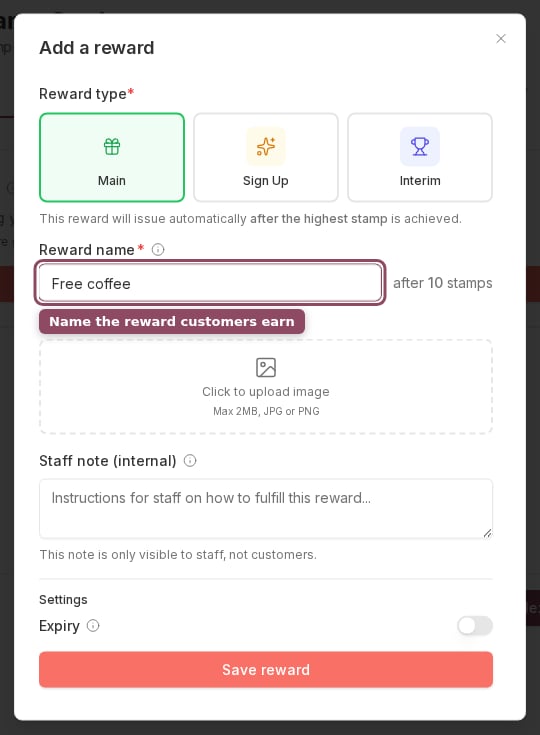
 **2. Rewards** — Click **Add Reward** and fill in the reward name, trigger value (auto-set to your stamp goal), and an optional expiry period. Every card needs at least one Main reward before you can publish it. Click **Save Reward**, then **Next**.
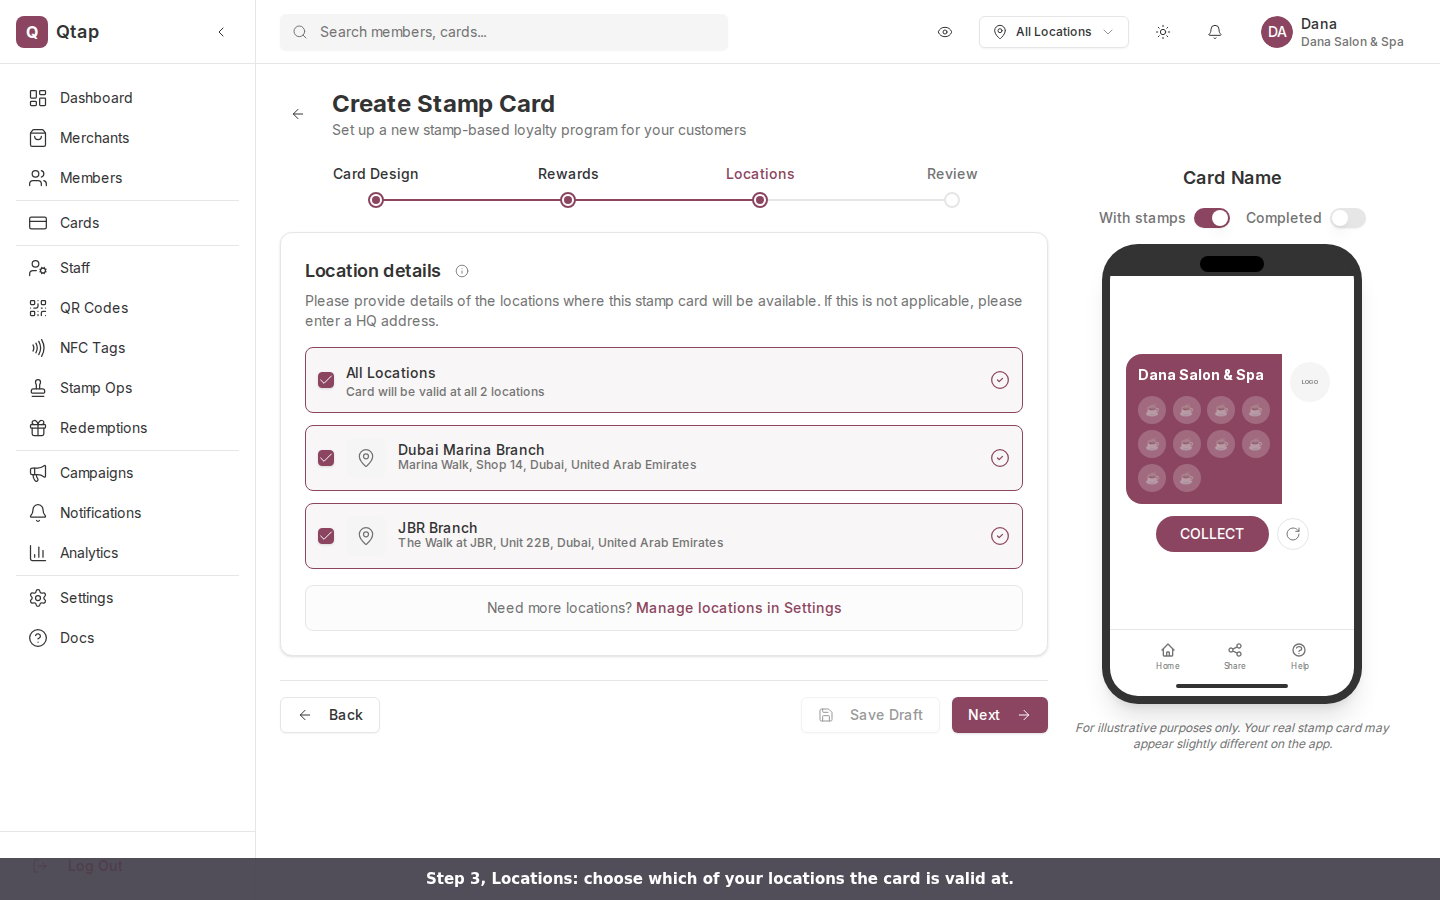
 **3. Locations** — Select which of your locations this card is valid at. You can choose all locations or a specific subset. Click **Next**.
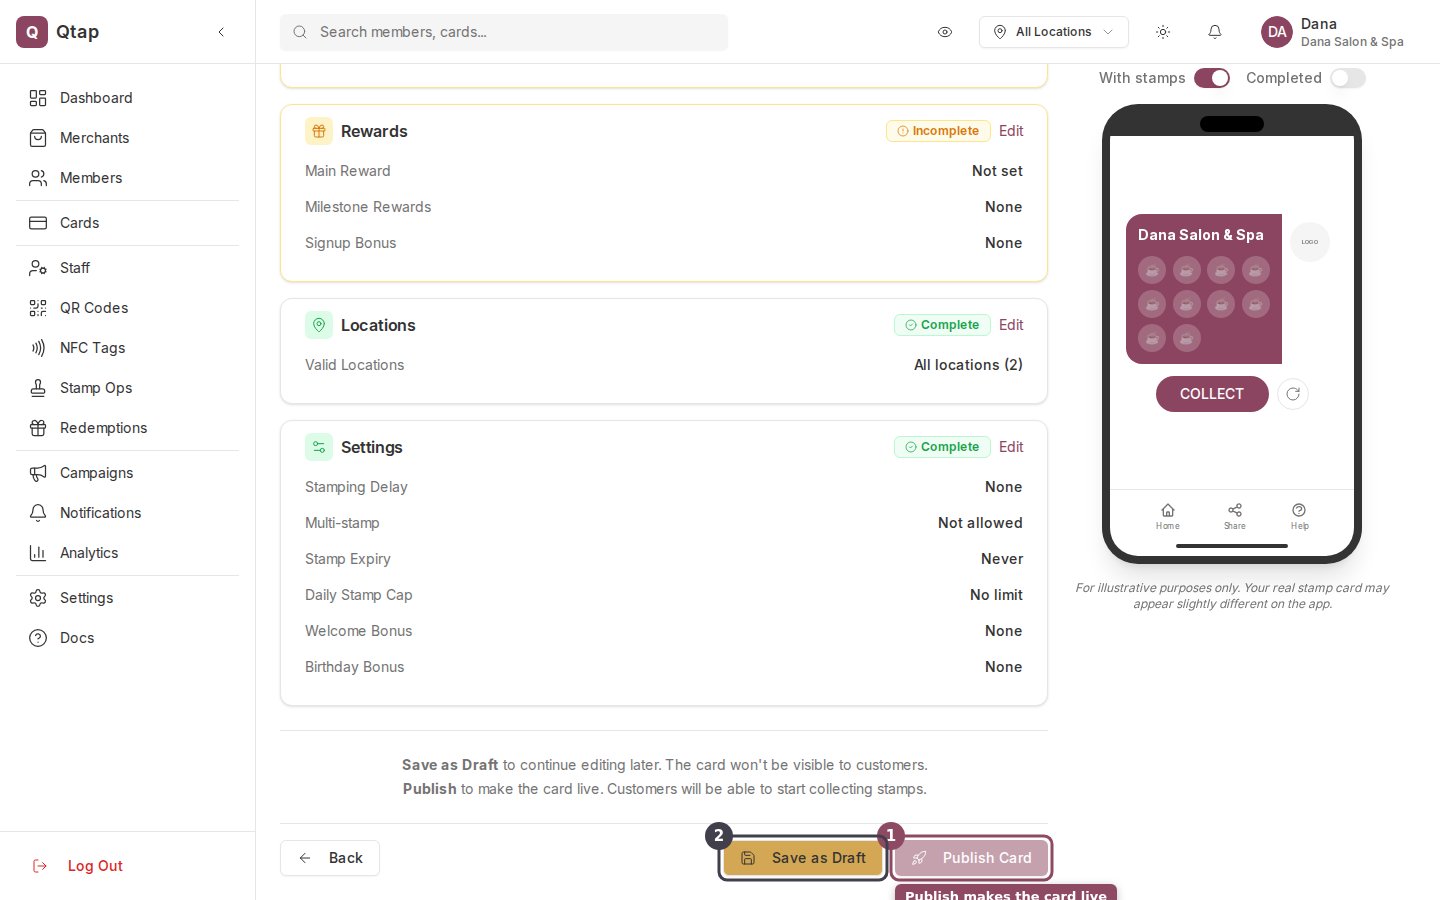
 **4. Review** — Check that your settings look right. Click **Publish** to make the card live, or **Save as Draft** to finish it later.
 Once a card is published and customers have joined, you can still edit the design and description. You cannot lower the stamp goal below the number of stamps any active member already has.
## What Happens Next
After publishing, the stamp card appears in the Qtap mobile app for customers to find and join. Staff stamp customer cards by scanning the customer's QR code from the **Stamp Operations** screen.
If you want to run a points program instead, go to **Cards > New Card** and select **Points Program** at the start of the setup wizard.
Deleting a stamp card removes it for all members currently enrolled. This cannot be undone. If you want to stop accepting new stamps without removing existing cards from members, set the card to **Inactive** instead.
Learn what stamp cards are and how they work
Detailed walkthrough of every field in the card setup wizard
How staff stamp cards and customers redeem rewards
Once a card is published and customers have joined, you can still edit the design and description. You cannot lower the stamp goal below the number of stamps any active member already has.
## What Happens Next
After publishing, the stamp card appears in the Qtap mobile app for customers to find and join. Staff stamp customer cards by scanning the customer's QR code from the **Stamp Operations** screen.
If you want to run a points program instead, go to **Cards > New Card** and select **Points Program** at the start of the setup wizard.
Deleting a stamp card removes it for all members currently enrolled. This cannot be undone. If you want to stop accepting new stamps without removing existing cards from members, set the card to **Inactive** instead.
Learn what stamp cards are and how they work
Detailed walkthrough of every field in the card setup wizard
How staff stamp cards and customers redeem rewards