> ## Documentation Index
> Fetch the complete documentation index at: https://docs.qtap.qa/llms.txt
> Use this file to discover all available pages before exploring further.
# Creating your Qtap account
> Sign up for Qtap with your email or with Google, confirm your address, and reach your dashboard for the first time.
Signing up creates your business on Qtap and makes you its owner. Your staff are later invited into the business this form creates, and the name you type here is the name your customers see. The form lives at `dashboard.qtap.qa/signup`, and there is a **Sign up** link at the bottom of the login page if you land there first.
## Sign up with your email
Open the signup page and fill in four things.
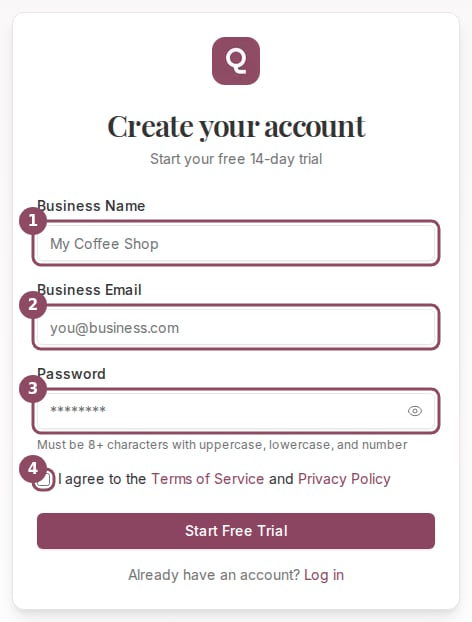 The trading name your customers know you by. Qtap uses it as the name of your business across the dashboard, and it also builds the first version of your public page address from it. You can rename the business later in Settings, and an owner or manager can change the public address separately from the merchant page.
The address you will log in with. It also receives your confirmation email, so use one you can open now.
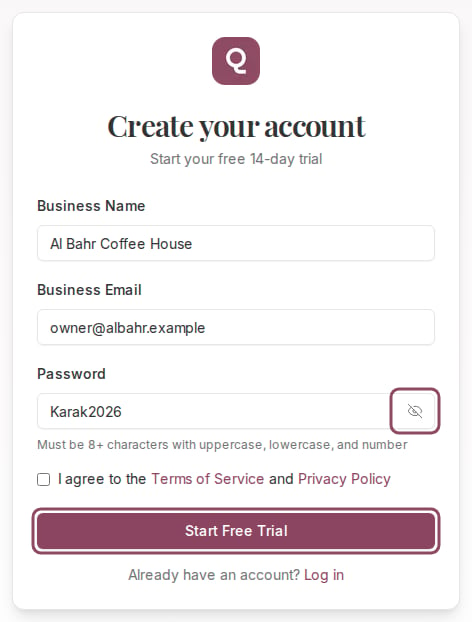
At least 8 characters, with an uppercase letter, a lowercase letter, and a number. The eye button on the right shows what you typed, which is worth using before you commit to a password you cannot repeat.
Tick the box. The form will not submit without it.
Then press **Start Free Trial**.
The trading name your customers know you by. Qtap uses it as the name of your business across the dashboard, and it also builds the first version of your public page address from it. You can rename the business later in Settings, and an owner or manager can change the public address separately from the merchant page.
The address you will log in with. It also receives your confirmation email, so use one you can open now.
At least 8 characters, with an uppercase letter, a lowercase letter, and a number. The eye button on the right shows what you typed, which is worth using before you commit to a password you cannot repeat.
Tick the box. The form will not submit without it.
Then press **Start Free Trial**.
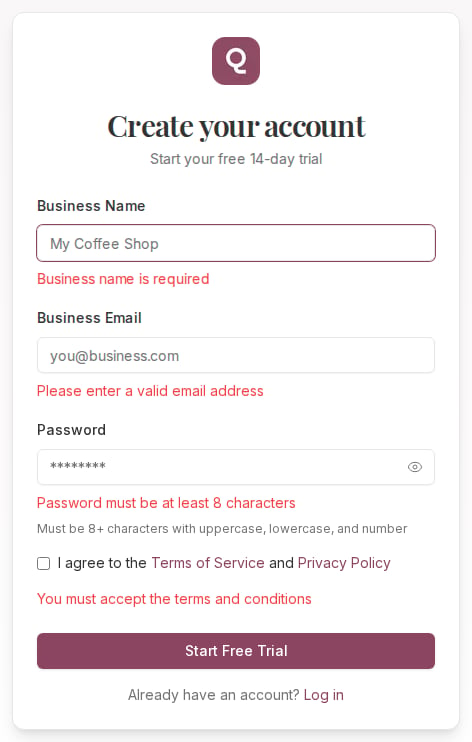
 If anything is missing or too short, Qtap marks the fields in red and nothing is sent. The messages name the exact problem, so you can fix them one by one.
 The button says Start Free Trial, but the 14 days do not begin here. Pressing it creates your account and your business record. The trial clock starts when you finish the onboarding steps that come after. See [Your free trial](/merchants/billing/trial) for what the trial covers.
## Confirm your email
Qtap sends a message from **Qtap** with the subject **Confirm your Qtap account**, and shows you this screen while it waits.
The button says Start Free Trial, but the 14 days do not begin here. Pressing it creates your account and your business record. The trial clock starts when you finish the onboarding steps that come after. See [Your free trial](/merchants/billing/trial) for what the trial covers.
## Confirm your email
Qtap sends a message from **Qtap** with the subject **Confirm your Qtap account**, and shows you this screen while it waits.
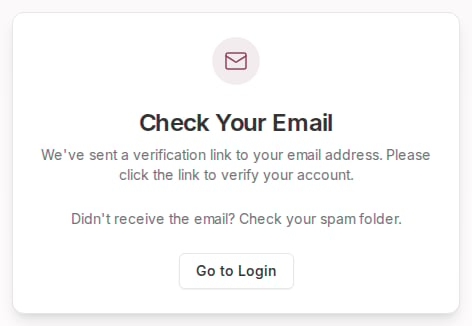 Open the email and press **Confirm Email**. That takes you straight into onboarding, where you set up your business details and your first loyalty card. See [The onboarding wizard](/merchants/onboarding-wizard) for what those steps ask.
The confirmation link expires after 24 hours, and this screen has no button to send another one. Your account and business are already created at this point, so if the email has not arrived, check your spam folder first rather than signing up again. If it is still missing, contact Qtap support and ask for a fresh link.
## Sign up with Google instead
Qtap also accepts a Google account. The button for it sits on the **Log in** page rather than the signup page, which catches people out on their first visit.
Open the email and press **Confirm Email**. That takes you straight into onboarding, where you set up your business details and your first loyalty card. See [The onboarding wizard](/merchants/onboarding-wizard) for what those steps ask.
The confirmation link expires after 24 hours, and this screen has no button to send another one. Your account and business are already created at this point, so if the email has not arrived, check your spam folder first rather than signing up again. If it is still missing, contact Qtap support and ask for a fresh link.
## Sign up with Google instead
Qtap also accepts a Google account. The button for it sits on the **Log in** page rather than the signup page, which catches people out on their first visit.
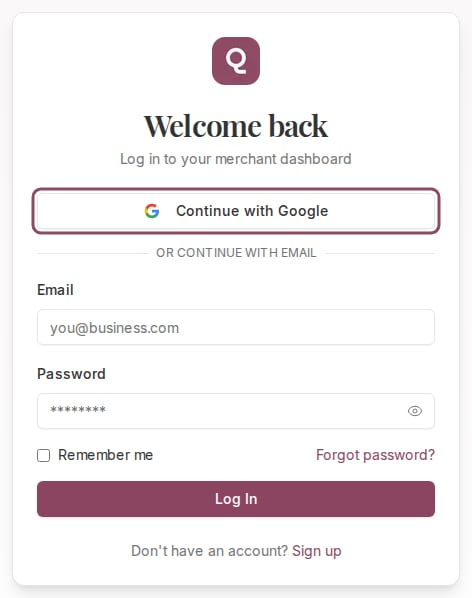 Press **Continue with Google** and pick your Google account. If Qtap has never seen you before, it creates the account and the business, makes you the owner, and sends you straight to onboarding. There is no confirmation email on this route, because Google has already verified the address.
A business created this way is named after your Google profile, in the form `Sara's Organization`. Rename it under Settings, in the Business Information card, and your customers will see the corrected name.
## Logging in afterwards
Once the account exists you log in at `dashboard.qtap.qa/login` with the same email and password, or with the same Google account. **Remember me** keeps you signed in on that browser. If the password has gone, [Resetting a forgotten password](/merchants/settings/password-reset) covers the recovery link.
This documentation is built and hosted on [Mintlify](https://mintlify.com), a developer documentation platform.
Press **Continue with Google** and pick your Google account. If Qtap has never seen you before, it creates the account and the business, makes you the owner, and sends you straight to onboarding. There is no confirmation email on this route, because Google has already verified the address.
A business created this way is named after your Google profile, in the form `Sara's Organization`. Rename it under Settings, in the Business Information card, and your customers will see the corrected name.
## Logging in afterwards
Once the account exists you log in at `dashboard.qtap.qa/login` with the same email and password, or with the same Google account. **Remember me** keeps you signed in on that browser. If the password has gone, [Resetting a forgotten password](/merchants/settings/password-reset) covers the recovery link.
This documentation is built and hosted on [Mintlify](https://mintlify.com), a developer documentation platform.