> ## Documentation Index
> Fetch the complete documentation index at: https://docs.qtap.qa/llms.txt
> Use this file to discover all available pages before exploring further.
# Designing your Wallet pass
> Set the colours and logo customers see when your loyalty card sits in Apple Wallet.
When a customer adds your loyalty card to Apple Wallet, the pass takes your card colour and
your business logo. The pass design studio lets you set that appearance on purpose instead
of inheriting it, and push the change to passes that are already on customers' phones.
## Opening the studio
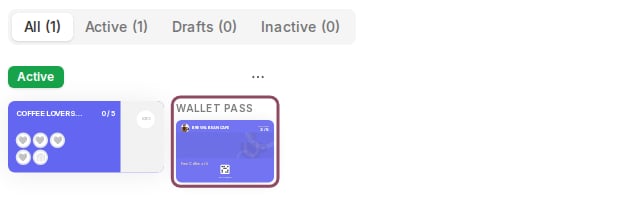
Go to **Cards** (or **Points** on a points account). Each programme in the list shows two
previews side by side. The left one is the card as it looks inside the Qtap app. The right
one, labelled **Wallet pass**, opens the design studio.
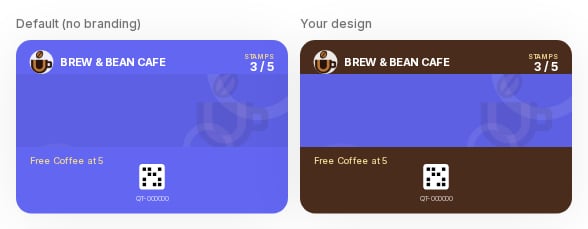
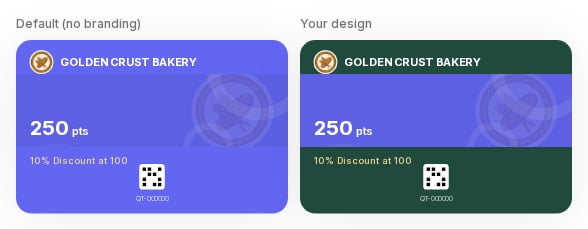
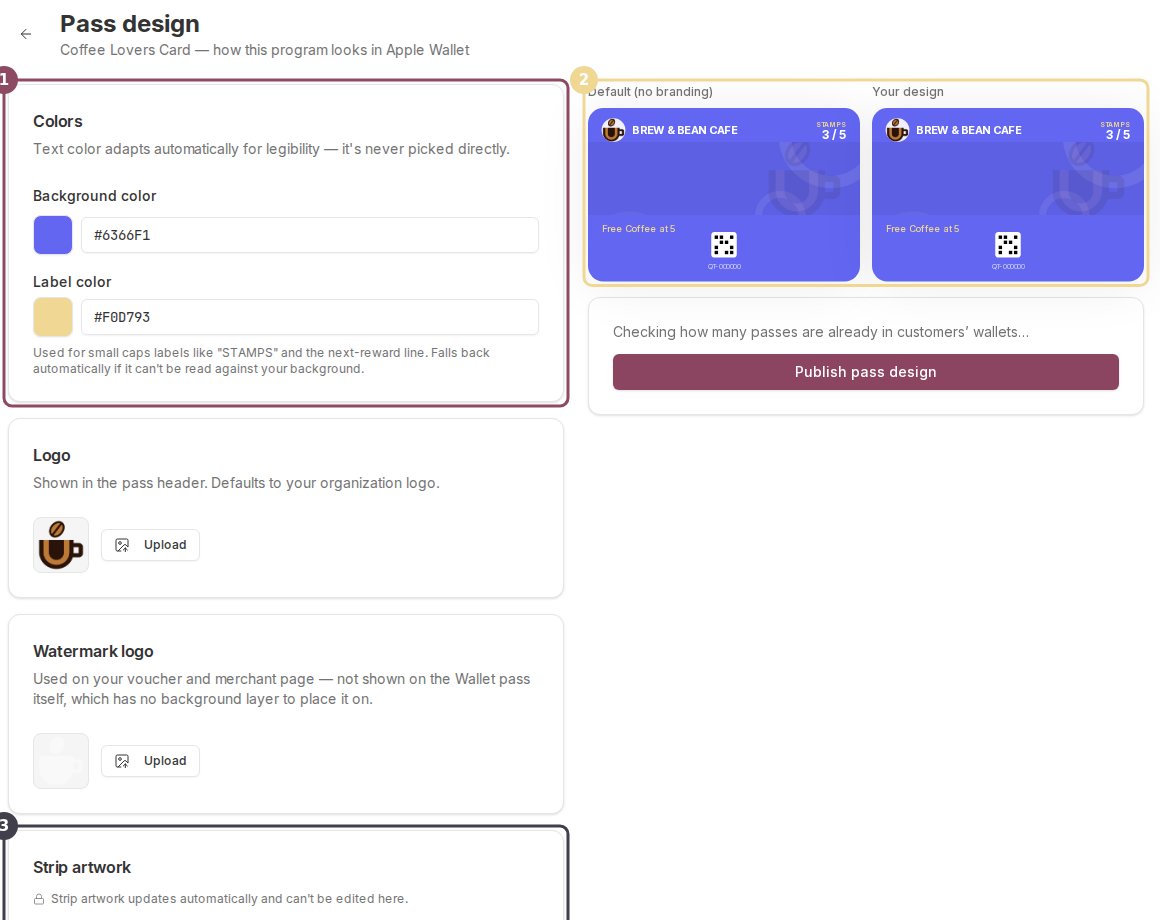 Two previews sit at the top right. **Default (no branding)** is the pass as it looks today,
and **Your design** updates as you change things. The stamp count and points balance in both
are sample numbers, not a real customer's.
## Colours
**Background colour** is the whole face of the pass. Leave it and the pass falls back to
your programme's card colour.
**Label colour** is used for the small caps headings like STAMPS and for the next-reward
line at the bottom. It starts on the Qtap gold.
Two previews sit at the top right. **Default (no branding)** is the pass as it looks today,
and **Your design** updates as you change things. The stamp count and points balance in both
are sample numbers, not a real customer's.
## Colours
**Background colour** is the whole face of the pass. Leave it and the pass falls back to
your programme's card colour.
**Label colour** is used for the small caps headings like STAMPS and for the next-reward
line at the bottom. It starts on the Qtap gold.
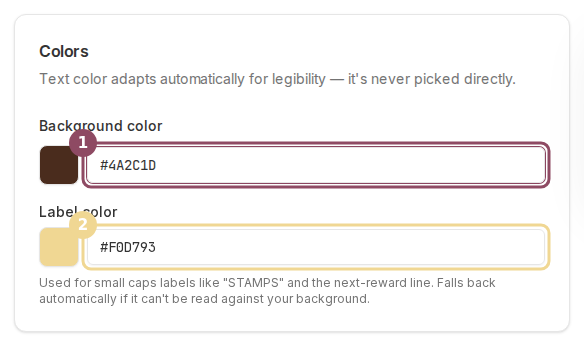 You never pick the main text colour. Qtap works it out from your background so the business
name and the counter stay readable.
The label colour has the same protection. Pick one that is too close to your background and
Qtap swaps it for black or white, whichever reads better, and shows a short **Adjusted for
legibility** note next to the field.
You never pick the main text colour. Qtap works it out from your background so the business
name and the counter stay readable.
The label colour has the same protection. Pick one that is too close to your background and
Qtap swaps it for black or white, whichever reads better, and shows a short **Adjusted for
legibility** note next to the field.
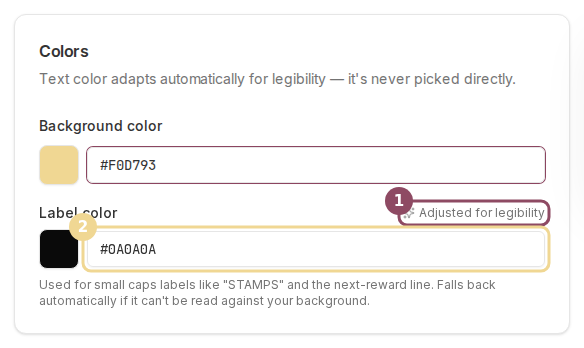 The same check runs again when you publish, so a pass never ships with text nobody can read.
 ## Logo and images
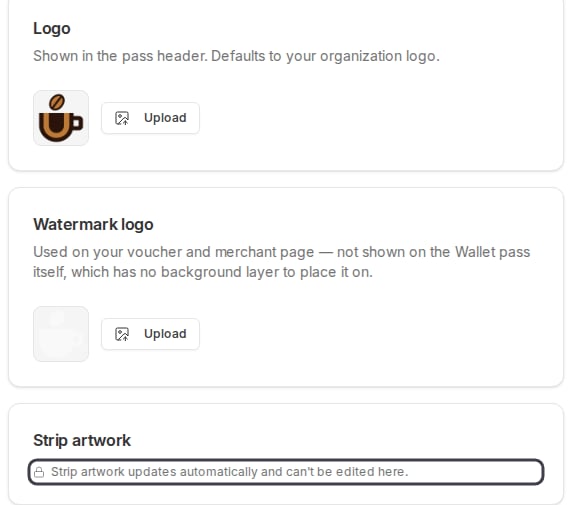
**Logo** is the round mark in the pass header. It uses your business logo unless you upload
something else here. Files must be PNG or JPEG and under 1 MB. Once you have uploaded one, a
**Use default** button appears to put your business logo back.
**Watermark logo** does not appear on the Wallet pass at all. It is used on your vouchers and
your merchant page, and it sits in this studio because it is the same kind of asset.
**Strip artwork** is the band across the middle of the pass. Qtap generates it from your
programme and updates it as a customer's progress changes, so there is nothing to edit.
## Logo and images
**Logo** is the round mark in the pass header. It uses your business logo unless you upload
something else here. Files must be PNG or JPEG and under 1 MB. Once you have uploaded one, a
**Use default** button appears to put your business logo back.
**Watermark logo** does not appear on the Wallet pass at all. It is used on your vouchers and
your merchant page, and it sits in this studio because it is the same kind of asset.
**Strip artwork** is the band across the middle of the pass. Qtap generates it from your
programme and updates it as a customer's progress changes, so there is nothing to edit.
 ## Publishing
Nothing is saved until you press **Publish pass design**, so leaving the page drops your
changes. The line above the button tells you how many passes are already in customers'
wallets and will be updated.
Publishing writes the design and then pushes it out. A pass registered for updates on a
phone changes within moments. Any other pass picks up the new look the next time it syncs.
## Publishing
Nothing is saved until you press **Publish pass design**, so leaving the page drops your
changes. The line above the button tells you how many passes are already in customers'
wallets and will be updated.
Publishing writes the design and then pushes it out. A pass registered for updates on a
phone changes within moments. Any other pass picks up the new look the next time it syncs.
 Owners and managers can change a pass design. A teammate on the Staff role has no access to
cards or points programmes by default, so the studio is closed to them.
Colours and rewards for the card itself are set elsewhere. See
[Editing a stamp card](/merchants/stamp-cards/editing) or
[Editing a points program](/merchants/points/editing) for those.
This documentation is built and hosted on [Mintlify](https://mintlify.com), a developer documentation platform.
Owners and managers can change a pass design. A teammate on the Staff role has no access to
cards or points programmes by default, so the studio is closed to them.
Colours and rewards for the card itself are set elsewhere. See
[Editing a stamp card](/merchants/stamp-cards/editing) or
[Editing a points program](/merchants/points/editing) for those.
This documentation is built and hosted on [Mintlify](https://mintlify.com), a developer documentation platform.