> ## Documentation Index
> Fetch the complete documentation index at: https://docs.qtap.qa/llms.txt
> Use this file to discover all available pages before exploring further.
# Locations
> Add and manage the physical branches of your business so Qtap can track where stamps and points are issued.
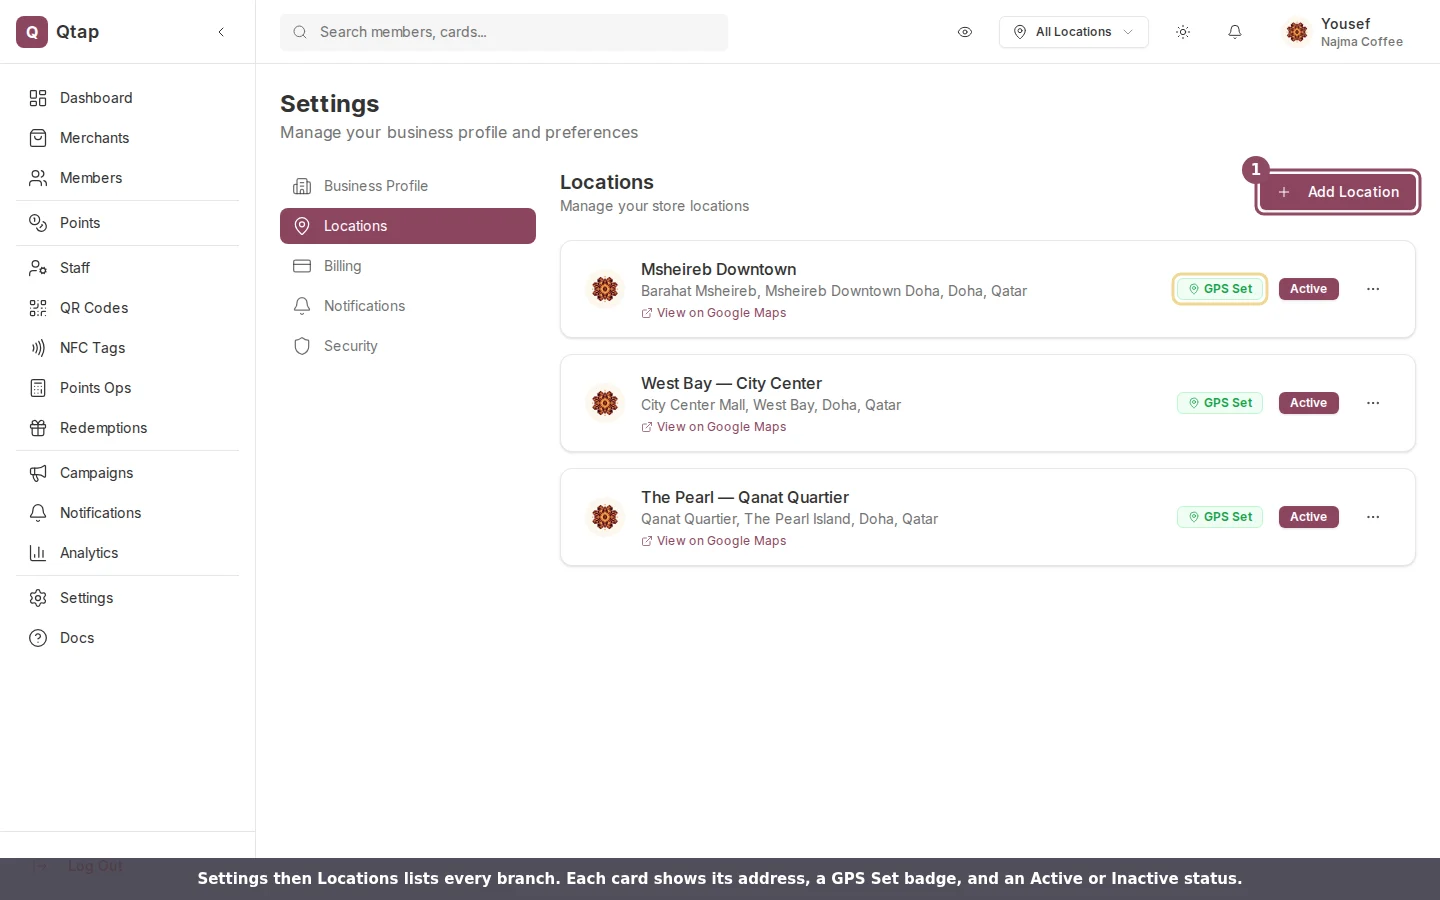
Each location in Qtap represents a physical branch of your business. Locations appear in analytics, can be assigned to QR codes, and show up on your merchant page so customers can find you.
Your plan determines how many active locations you can have. The **Add Location** button shows your current limit and disables when you've reached it.
 ## Add a location
1. Go to **Settings → Locations**.
2. Click **Add Location**.
3. Enter a **Location Name** — this is what staff and members see (e.g., "Main Branch", "City Centre Mall").
4. Use the **Location on Map** picker to place a pin. This saves GPS coordinates for the branch. Qtap fills in the address fields automatically when you pick a point.
5. Check or fill in **Address Line 1**, **City**, and **Country**.
6. Add a **Phone** number if you want it shown on your merchant page.
7. Click **Upload** next to **Location Logo** to add a branch photo or logo.
8. Enter a **Google Rating** between 0 and 5 to show your rating on the merchant page.
9. Set **Opening Hours** for each day. Toggle a day off if the branch is closed that day.
10. Leave the **Active** toggle on.
11. Click **Add Location**.
## Add a location
1. Go to **Settings → Locations**.
2. Click **Add Location**.
3. Enter a **Location Name** — this is what staff and members see (e.g., "Main Branch", "City Centre Mall").
4. Use the **Location on Map** picker to place a pin. This saves GPS coordinates for the branch. Qtap fills in the address fields automatically when you pick a point.
5. Check or fill in **Address Line 1**, **City**, and **Country**.
6. Add a **Phone** number if you want it shown on your merchant page.
7. Click **Upload** next to **Location Logo** to add a branch photo or logo.
8. Enter a **Google Rating** between 0 and 5 to show your rating on the merchant page.
9. Set **Opening Hours** for each day. Toggle a day off if the branch is closed that day.
10. Leave the **Active** toggle on.
11. Click **Add Location**.
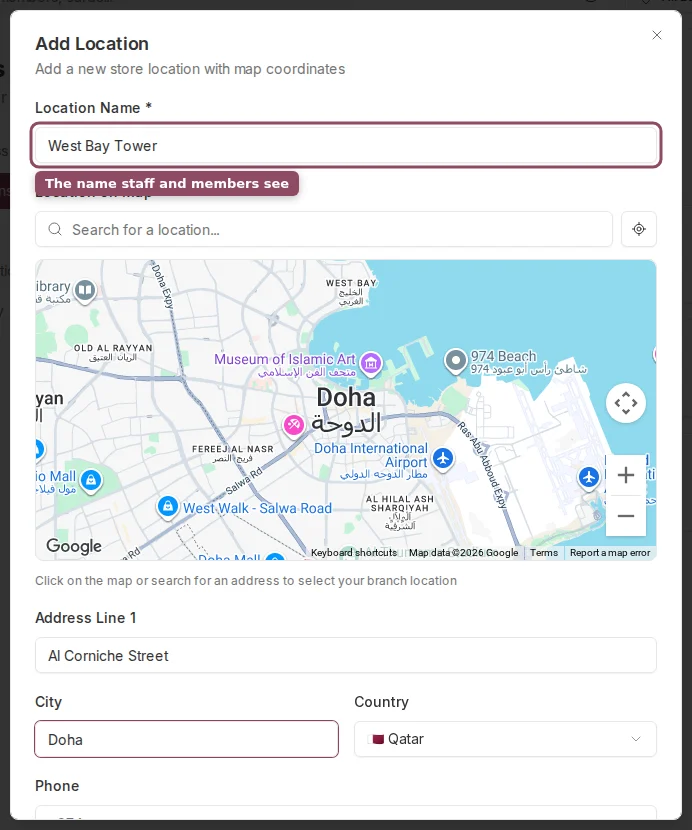 The map picker accepts a typed address. If dropping a pin manually is awkward, type the branch name or street address into the search field instead.
## Edit a location
Click the three-dot menu on any location card and choose **Edit**. The same form opens with your existing details. Click **Update Location** to save.
The map picker accepts a typed address. If dropping a pin manually is awkward, type the branch name or street address into the search field instead.
## Edit a location
Click the three-dot menu on any location card and choose **Edit**. The same form opens with your existing details. Click **Update Location** to save.
 ## Delete a location
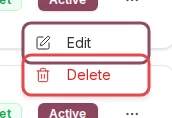
Click the three-dot menu and choose **Delete**. Deletion is permanent. QR codes that were assigned to that location will no longer filter by branch, but all existing stamp and points history is kept.
## Active and inactive locations
The **Active** toggle controls whether a location counts toward your plan limit and shows up in the dashboard and on your merchant page.
Toggling a location inactive is useful when a branch is temporarily closed. You can reactivate it at any time without losing any data.
Your plan has a cap on active locations. If you hit the limit, the Add Location button shows "Location Limit (n)" and you won't be able to add more without upgrading your plan or deactivating an existing branch.
## GPS badge
A location card shows a green **GPS Set** badge when coordinates are saved. Without GPS, the branch won't appear correctly on customer-facing maps.
Click **View on Google Maps** on any card to confirm the pin is placed correctly.
Assign QR codes to specific locations to track stamps by branch.
Compare stamp and member activity across all your branches.
## Delete a location
Click the three-dot menu and choose **Delete**. Deletion is permanent. QR codes that were assigned to that location will no longer filter by branch, but all existing stamp and points history is kept.
## Active and inactive locations
The **Active** toggle controls whether a location counts toward your plan limit and shows up in the dashboard and on your merchant page.
Toggling a location inactive is useful when a branch is temporarily closed. You can reactivate it at any time without losing any data.
Your plan has a cap on active locations. If you hit the limit, the Add Location button shows "Location Limit (n)" and you won't be able to add more without upgrading your plan or deactivating an existing branch.
## GPS badge
A location card shows a green **GPS Set** badge when coordinates are saved. Without GPS, the branch won't appear correctly on customer-facing maps.
Click **View on Google Maps** on any card to confirm the pin is placed correctly.
Assign QR codes to specific locations to track stamps by branch.
Compare stamp and member activity across all your branches.