> ## Documentation Index
> Fetch the complete documentation index at: https://docs.qtap.qa/llms.txt
> Use this file to discover all available pages before exploring further.
# Inviting a Team Member
> Send a staff invitation and walk a new teammate through accepting it.
When you hire someone to run the counter or manage a location, you give them their own Qtap login instead of sharing yours. You send an invitation from the Staff page, they accept it by email, and from then on they sign in as themselves. This page walks through both halves: sending the invite, and what your teammate does to accept it.
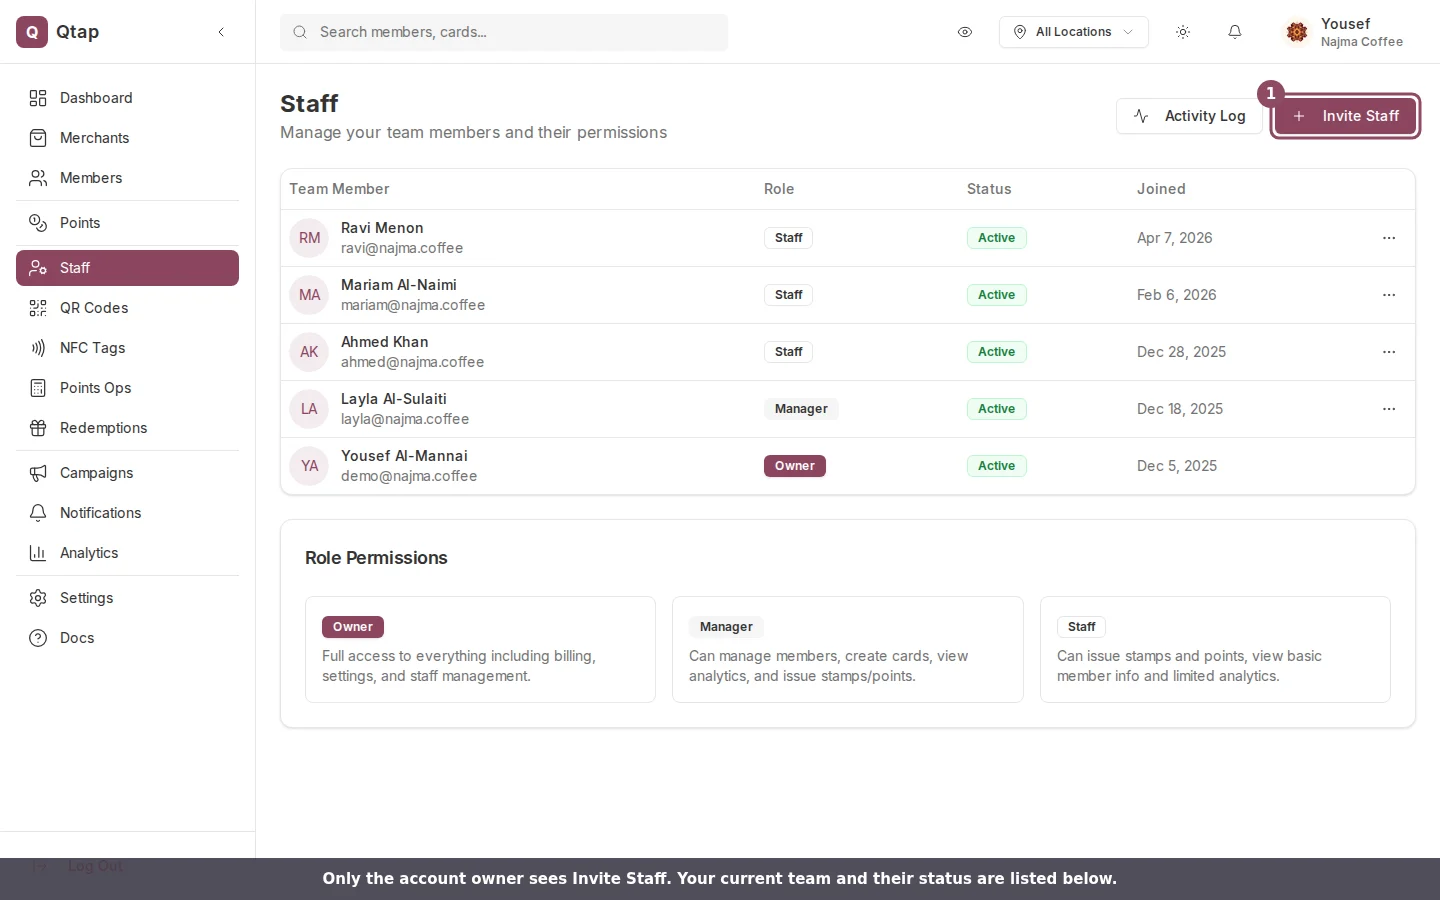
Only the account owner can invite staff. Managers and staff members don't see the **Invite Staff** button, even though they can open the Staff page.
## Send the invitation
Go to **Staff** in the left sidebar, then click **Invite Staff** in the top right.
 A short form opens. Fill in:
* **First name** (required) and **last name** (optional). This is how the person shows up in your staff list.
* **Email address** (required). The invitation goes here, so double-check it.
* **Role**. Pick **Staff** for someone who works the counter, or **Manager** for someone who runs the business with you. The dropdown describes what each role can do. New invites default to Staff.
* **Assigned locations**. If you have more than one location and the role is Staff, you can limit them to specific branches. Leave **All Locations** ticked to let them work anywhere. Managers always cover every location.
A short form opens. Fill in:
* **First name** (required) and **last name** (optional). This is how the person shows up in your staff list.
* **Email address** (required). The invitation goes here, so double-check it.
* **Role**. Pick **Staff** for someone who works the counter, or **Manager** for someone who runs the business with you. The dropdown describes what each role can do. New invites default to Staff.
* **Assigned locations**. If you have more than one location and the role is Staff, you can limit them to specific branches. Leave **All Locations** ticked to let them work anywhere. Managers always cover every location.
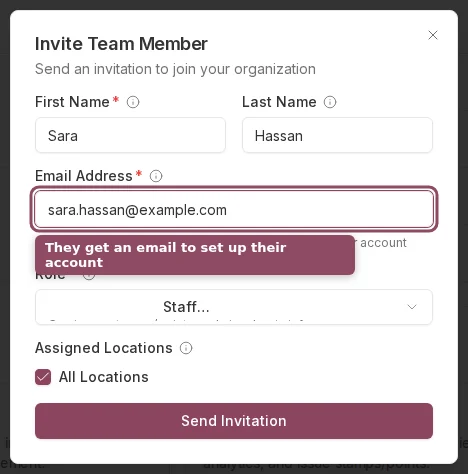 Click **Send Invitation**. Qtap emails the person a link and adds them to your staff list right away.
## What happens after you send it
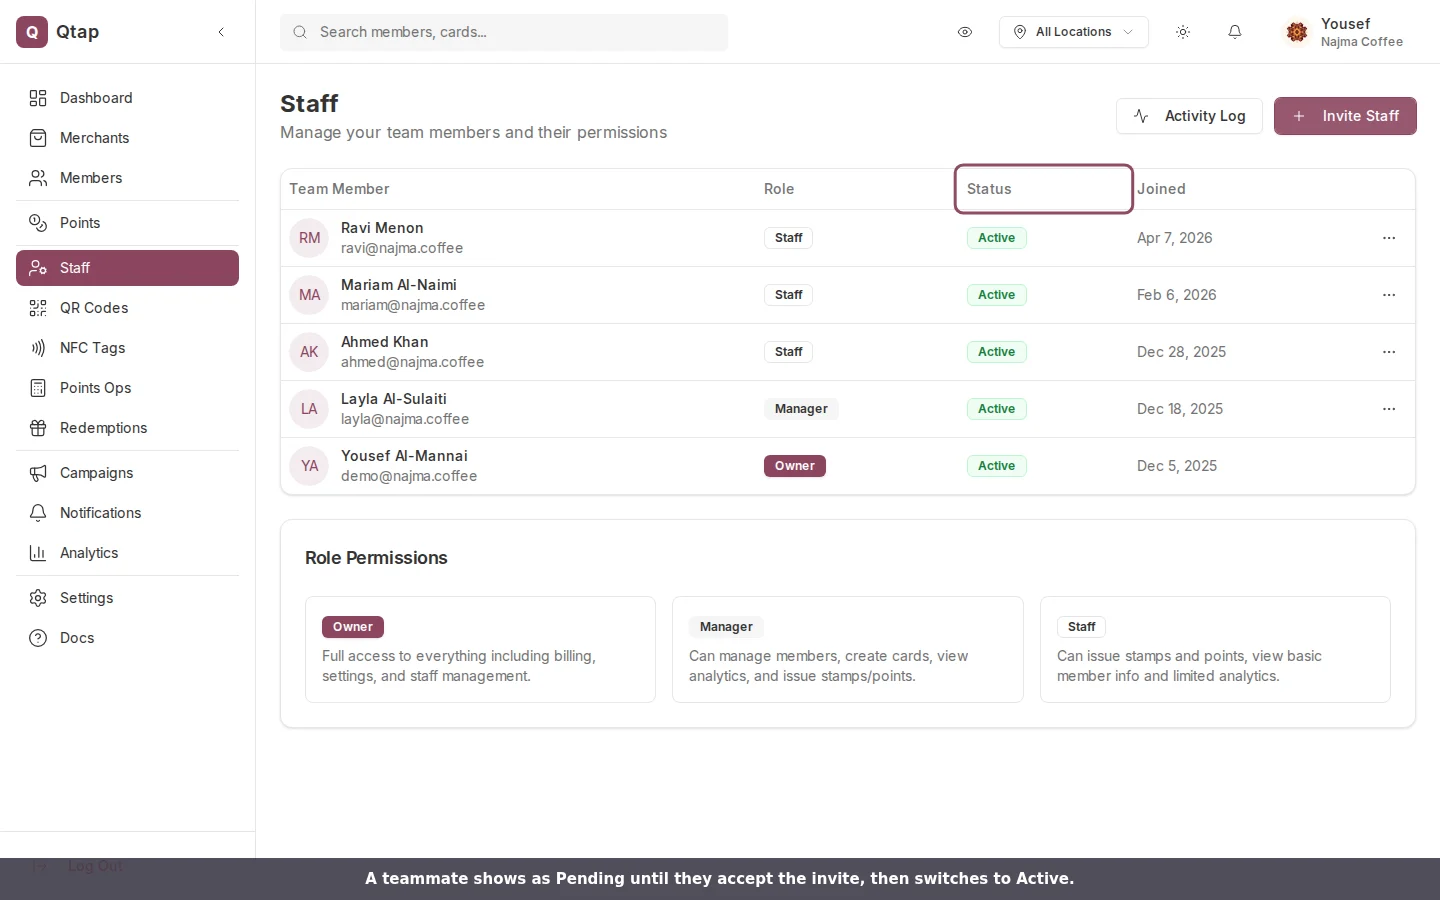
The new teammate appears in your staff list with a **Pending** status. Pending means the invite has been sent but they haven't set up their login yet. Once they accept, the status changes to **Active** and the Joined date fills in.
Click **Send Invitation**. Qtap emails the person a link and adds them to your staff list right away.
## What happens after you send it
The new teammate appears in your staff list with a **Pending** status. Pending means the invite has been sent but they haven't set up their login yet. Once they accept, the status changes to **Active** and the Joined date fills in.
 ## Accepting the invite
Your teammate gets an email with the subject "You're invited to join \[your business] on Qtap." When they open the link, they land on a welcome page that greets them by name and shows which business invited them and as what role.
To finish, they create a password. It needs to be at least 8 characters and include an uppercase letter, a lowercase letter, and a number. After they save it, Qtap signs them in and drops them straight onto the dashboard. That's when their status flips to Active on your end.
If the person already uses Qtap with that email address, the invitation links your business to their existing account instead of asking them to start over.
The invite link is single-use and expires. If your teammate waits too long, they'll see "Invalid or expired invitation link" when they open it. Just resend the invite (below) to send a fresh one.
## If the invite doesn't arrive
Ask them to check spam first. If it's still missing, find their row in the staff list, click the three-dot menu, and choose **Resend Invite**. They'll get a new link at the same email address. The Resend option only shows while a member is still Pending.
## Plan limits
Your plan sets how many staff you can have. If you've reached the limit, the **Invite Staff** button shows your cap and is greyed out. Go to **Settings > Billing** to move to a plan with more seats.
What the owner, manager, and staff roles can each access, plus custom permissions.
Manage your full team list and remove members who leave.
## Accepting the invite
Your teammate gets an email with the subject "You're invited to join \[your business] on Qtap." When they open the link, they land on a welcome page that greets them by name and shows which business invited them and as what role.
To finish, they create a password. It needs to be at least 8 characters and include an uppercase letter, a lowercase letter, and a number. After they save it, Qtap signs them in and drops them straight onto the dashboard. That's when their status flips to Active on your end.
If the person already uses Qtap with that email address, the invitation links your business to their existing account instead of asking them to start over.
The invite link is single-use and expires. If your teammate waits too long, they'll see "Invalid or expired invitation link" when they open it. Just resend the invite (below) to send a fresh one.
## If the invite doesn't arrive
Ask them to check spam first. If it's still missing, find their row in the staff list, click the three-dot menu, and choose **Resend Invite**. They'll get a new link at the same email address. The Resend option only shows while a member is still Pending.
## Plan limits
Your plan sets how many staff you can have. If you've reached the limit, the **Invite Staff** button shows your cap and is greyed out. Go to **Settings > Billing** to move to a plan with more seats.
What the owner, manager, and staff roles can each access, plus custom permissions.
Manage your full team list and remove members who leave.