> ## Documentation Index
> Fetch the complete documentation index at: https://docs.qtap.qa/llms.txt
> Use this file to discover all available pages before exploring further.
# Staff Overview
> How to give your employees access to Qtap and what each role can do.
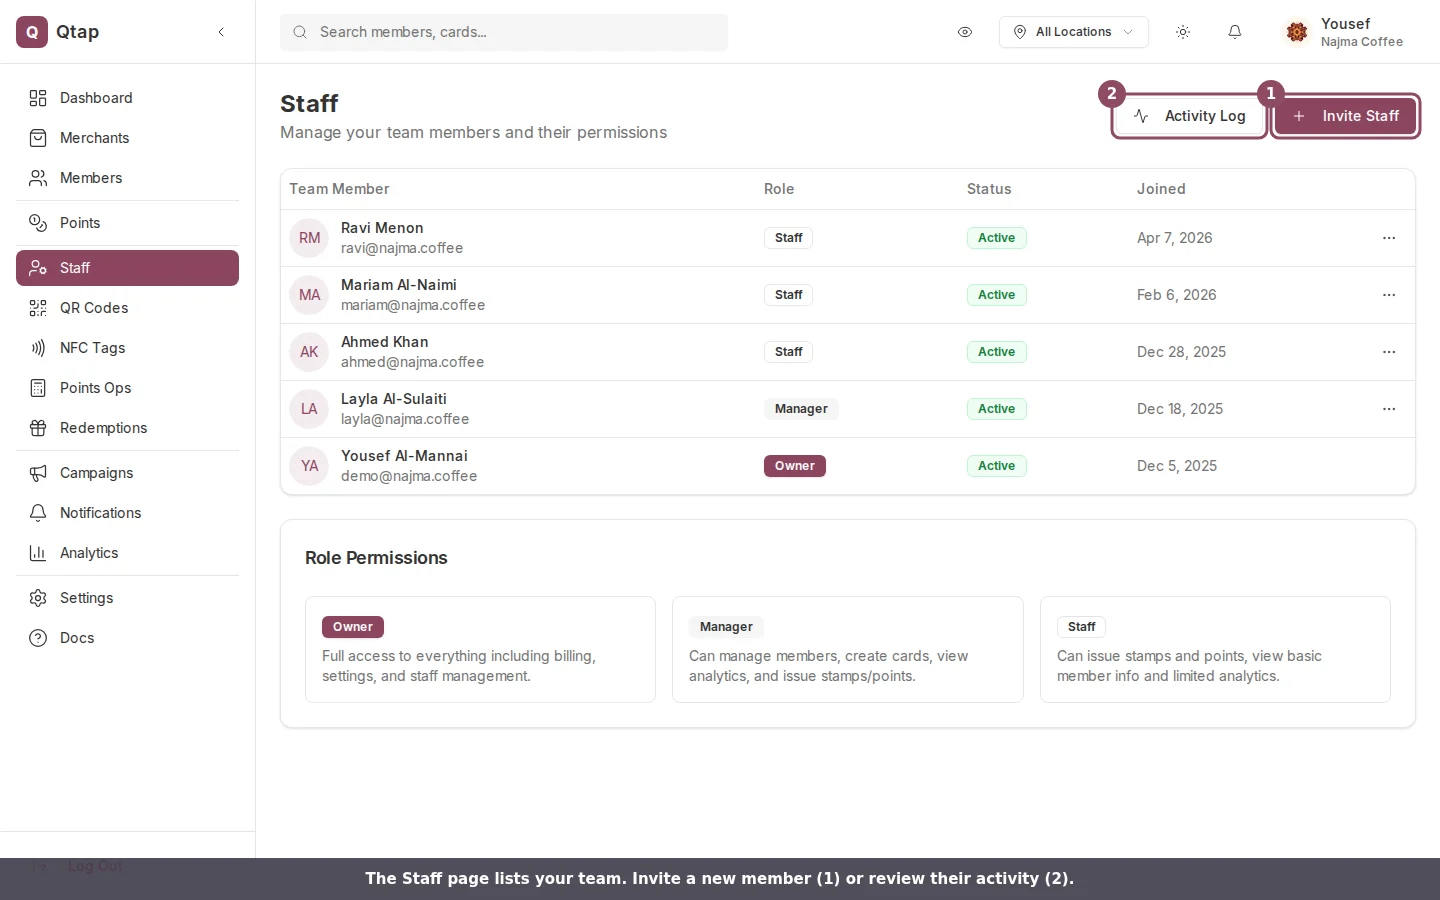
Staff members are the employees you invite to use the Qtap dashboard or mobile app at your locations. Each staff member gets their own login and a role that controls what they can access.
 ## Roles
There are two roles in Qtap:
**Manager** — can access all locations and all sections of the dashboard. Managers can view analytics, manage campaigns, and see member data across the entire organization.
**Staff** — has limited access by default. You control which locations they can work at and what actions they can take. A staff member might be able to issue stamps but not view analytics or export member data.
The account owner has full access to everything, including billing and settings. The owner role cannot be assigned to invited staff.
## What's on the Staff page
Go to **Staff** in the left sidebar to see your full staff list. Each row shows:
* The staff member's name and email
* Their role (Manager or Staff)
* Their status (Active or Pending)
* The date they were added
**Pending** means the invitation email has been sent but the staff member hasn't accepted it yet.
## Inviting a staff member
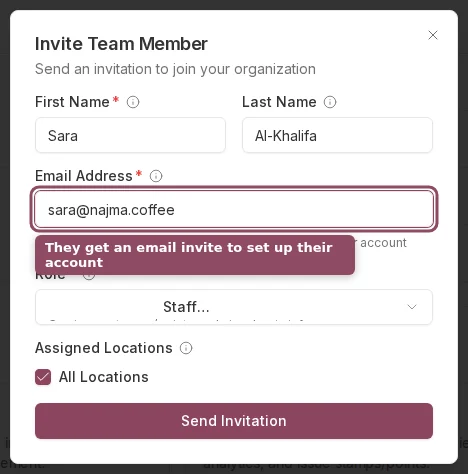
1. On the Staff page, click **Invite Staff Member**.
2. Fill in their first name, last name (optional), and email address.
3. Select their role: **Manager** or **Staff**.
4. If the role is Staff, select which locations they can access.
5. Click **Send Invite**.
The staff member receives an email with a link to create their account. Until they accept, their status shows as Pending.
## Roles
There are two roles in Qtap:
**Manager** — can access all locations and all sections of the dashboard. Managers can view analytics, manage campaigns, and see member data across the entire organization.
**Staff** — has limited access by default. You control which locations they can work at and what actions they can take. A staff member might be able to issue stamps but not view analytics or export member data.
The account owner has full access to everything, including billing and settings. The owner role cannot be assigned to invited staff.
## What's on the Staff page
Go to **Staff** in the left sidebar to see your full staff list. Each row shows:
* The staff member's name and email
* Their role (Manager or Staff)
* Their status (Active or Pending)
* The date they were added
**Pending** means the invitation email has been sent but the staff member hasn't accepted it yet.
## Inviting a staff member
1. On the Staff page, click **Invite Staff Member**.
2. Fill in their first name, last name (optional), and email address.
3. Select their role: **Manager** or **Staff**.
4. If the role is Staff, select which locations they can access.
5. Click **Send Invite**.
The staff member receives an email with a link to create their account. Until they accept, their status shows as Pending.
 If the invite email didn't arrive, click the three-dot menu next to their row and select **Resend Invite**.
## Removing a staff member
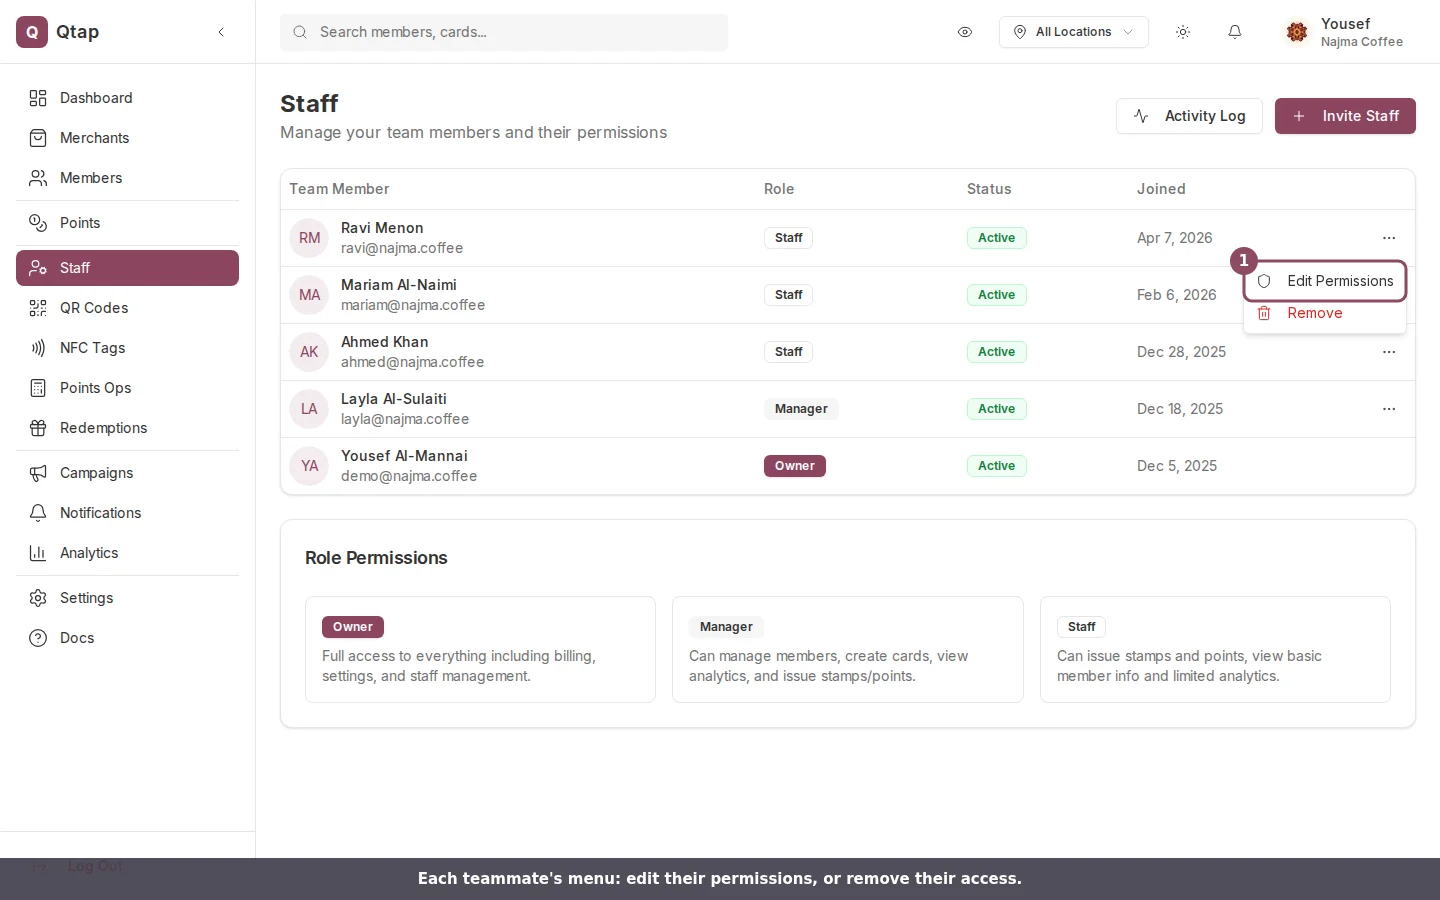
Click the three-dot menu next to the staff member's row and select **Remove**. This immediately revokes their access. Their historical activity (stamps issued, etc.) remains in your records.
If the invite email didn't arrive, click the three-dot menu next to their row and select **Resend Invite**.
## Removing a staff member
Click the three-dot menu next to the staff member's row and select **Remove**. This immediately revokes their access. Their historical activity (stamps issued, etc.) remains in your records.
 Removing a staff member cannot be undone. If they need access again, you'll need to send a new invite.
## Staff permissions
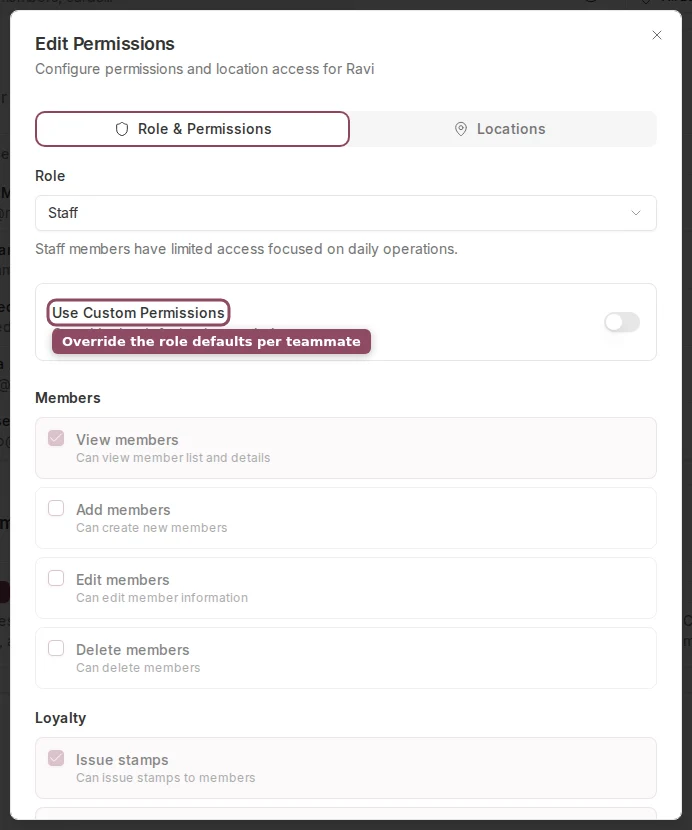
For staff with the Staff role, you can customize which sections of the dashboard they can access. Click the three-dot menu next to their name and select **Edit Permissions**. This opens the permissions dialog where you can grant or restrict access to members, analytics, and other sections.
Removing a staff member cannot be undone. If they need access again, you'll need to send a new invite.
## Staff permissions
For staff with the Staff role, you can customize which sections of the dashboard they can access. Click the three-dot menu next to their name and select **Edit Permissions**. This opens the permissions dialog where you can grant or restrict access to members, analytics, and other sections.
 Managers always have full access and cannot have their permissions restricted.
## Plan limits
Your plan determines how many staff members you can invite. If you've reached the limit, the **Invite Staff Member** button won't be available. Go to **Settings > Billing** to upgrade.
Detailed breakdown of what each role and permission level allows.
How to view a history of actions taken by your staff.
Managers always have full access and cannot have their permissions restricted.
## Plan limits
Your plan determines how many staff members you can invite. If you've reached the limit, the **Invite Staff Member** button won't be available. Go to **Settings > Billing** to upgrade.
Detailed breakdown of what each role and permission level allows.
How to view a history of actions taken by your staff.