

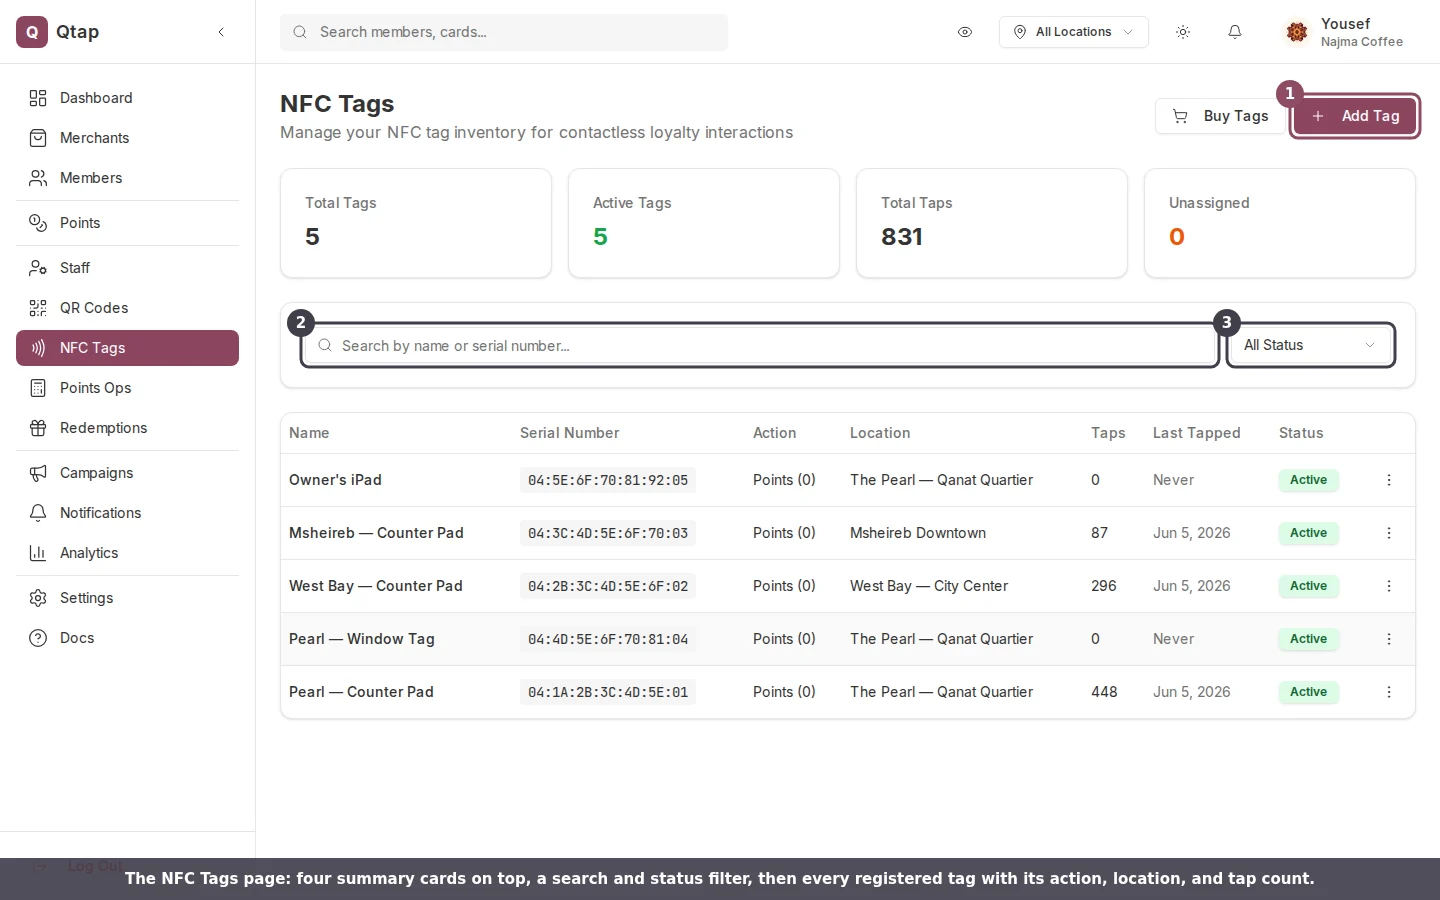
The NFC Tags page lists every registered tag with its action, location, and tap count, above four summary cards.
How NFC tags work
When a member taps their phone on an NFC tag, Qtap reads the tag’s serial number and performs the action you’ve configured — adding a stamp to a specific stamp card, awarding points, or recording a check-in. The tap is logged with a timestamp and linked to the member’s account. Each tag belongs to your organization and can optionally be assigned to a specific location.NFC tags are physical items you purchase through the dashboard. Go to Settings → Billing and look for the NFC Tags add-on ($19 per tag) to order them. Once they arrive, you register each one by entering its serial number.
Adding a tag
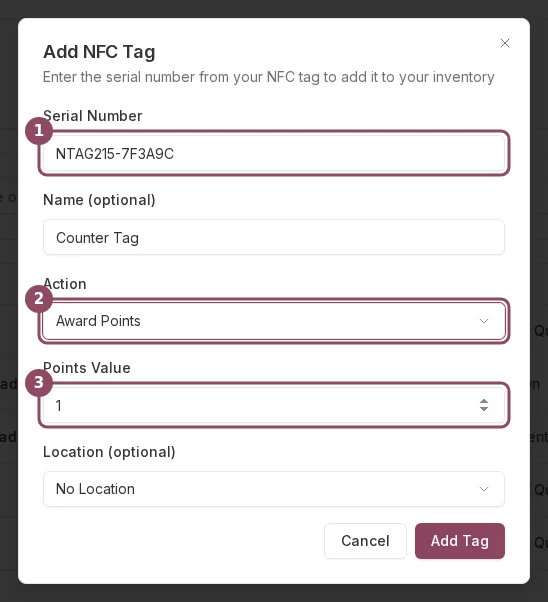
The Add Tag form: enter the serial number, name the tag, then choose what a tap does.
Managing your tags
The NFC Tags page shows all registered tags in a table. You can filter by name or serial number using the search field, or narrow by status using the Status dropdown (Active / Inactive / All). Each row shows:- Name and serial number
- Action configured for that tag
- Location assignment (or “Unassigned” if none)
- Taps — total number of times the tag has been tapped
- Last Tapped — the date of the most recent tap
- Status — Active or Inactive
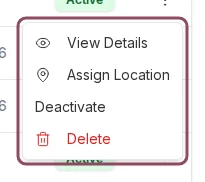
Open any tag's three-dot menu to view its details, assign a location, deactivate it, or delete it.
Changing a tag’s location
Click the three-dot menu on any tag row and select Assign Location. Pick a location from the dropdown and confirm. You can also change this on the tag’s detail page.Deactivating a tag
Click the three-dot menu and select Deactivate. Inactive tags remain in your inventory but won’t process taps. Use this if a tag is damaged or misplaced temporarily.Viewing tap activity
Click View Details on any tag to open its detail page. You’ll see:- Total tap count, action type, location assignment, and current status
- A line chart showing taps over the last 7 days
- A list of recent taps with timestamps
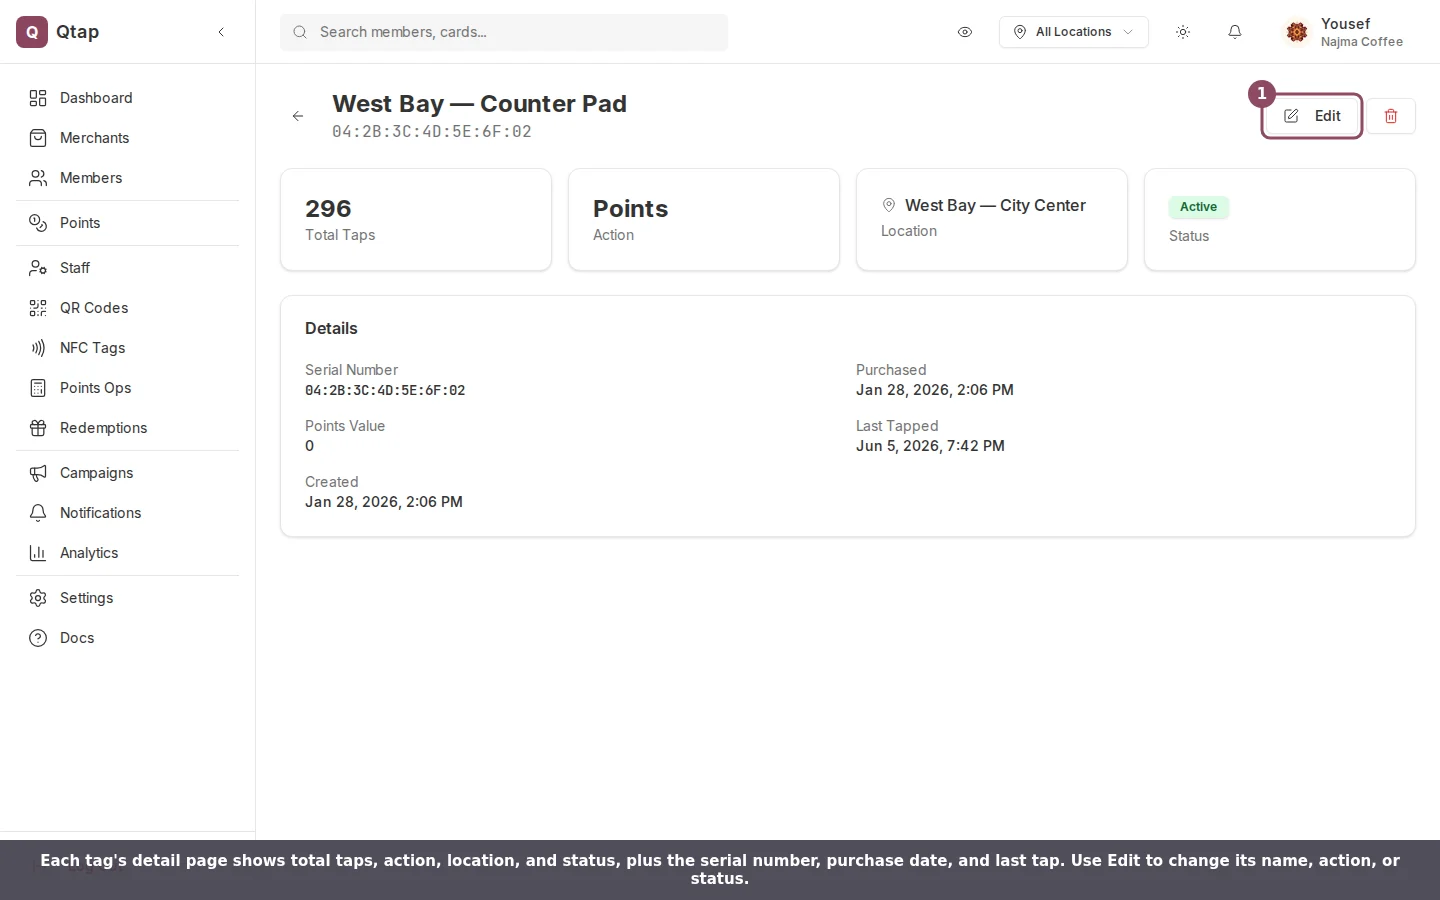
A tag's detail page shows its total taps, action, location, and status, plus its serial number and key dates.
Deleting a tag
Click Delete from the three-dot menu. This removes the tag from your dashboard permanently. All tap history for that tag is also deleted and cannot be recovered.Stats at a glance
At the top of the NFC Tags page, four summary cards show:- Total Tags — how many tags you’ve registered
- Active Tags — how many are currently active
- Total Taps — combined tap count across all tags
- Unassigned — tags not linked to any location
QR Codes
Generate and manage QR codes as an alternative to NFC tags
Stamp Cards
Set up stamp cards that your NFC tags can link to
Billing
Purchase NFC tags as an add-on through your billing settings