Your plan determines how many active loyalty cards you can have at once. If you’ve reached the limit, you’ll see a message on this page with a link to upgrade.
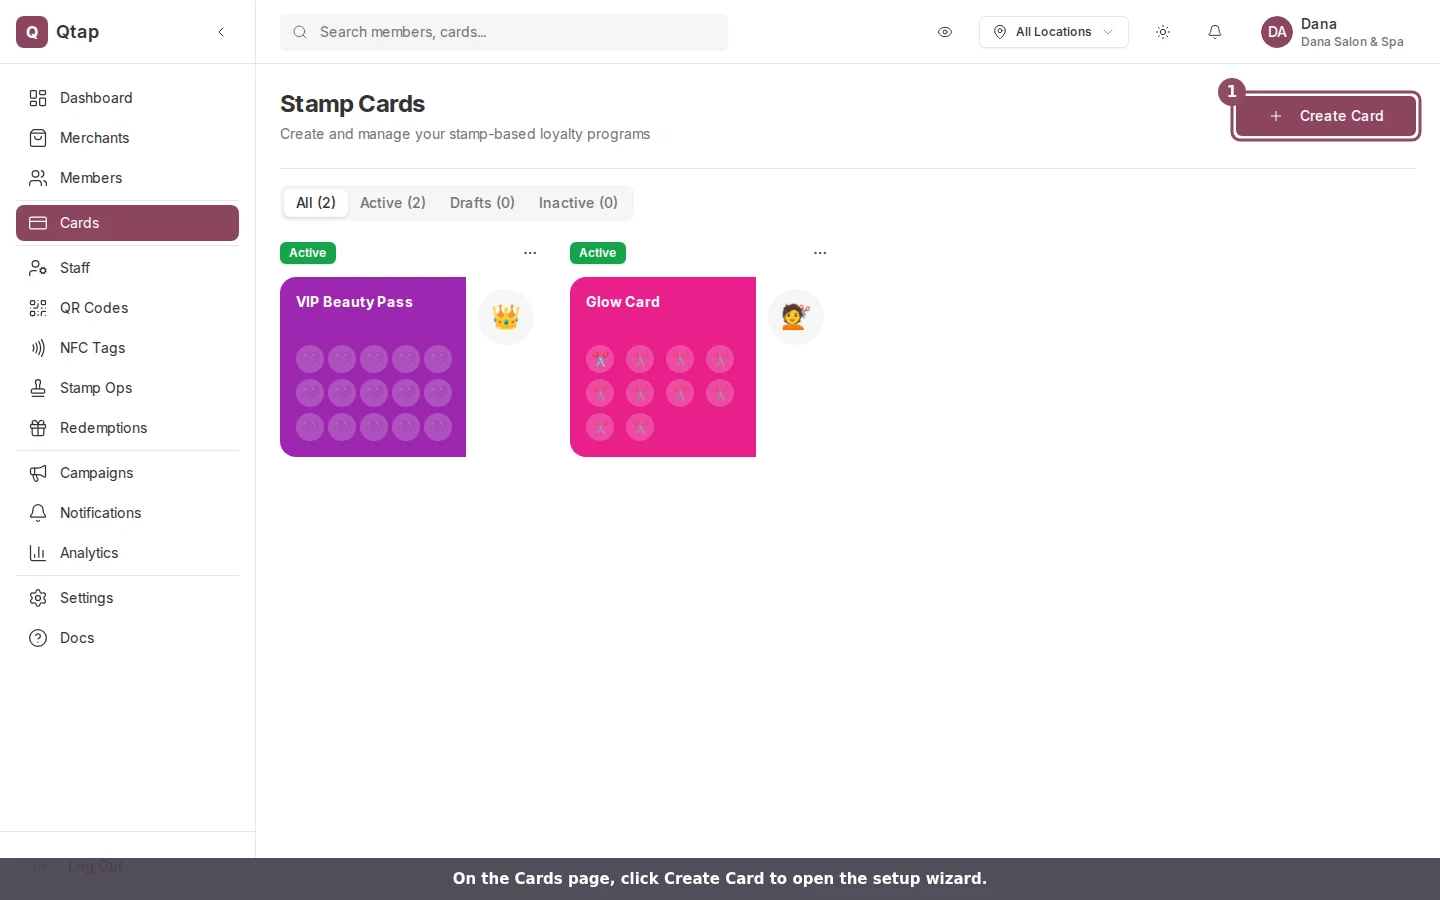
On the Cards page, the Create Card button opens the setup wizard.
Step 1: Card Design
This step sets how the card looks and behaves. Name is required and must be at least 2 characters. This is the name members see in the app. Description is optional. It appears on the back of the card in the app. Use it to tell members what the reward is or how to earn stamps. Stamps Required is the stamp goal — how many stamps a customer needs before they earn the main reward. It defaults to 10. Business Name is shown on the card. It pre-fills with your organization name. You can change it per card if you run more than one brand. Card Color is the background color of the card. Click the color swatch to open the color picker. Stamp Icon is the icon displayed in each stamp space. Pick from the built-in set (coffee cup, star, heart, etc.) or upload a custom PNG or SVG file up to 500KB. The icon is also shown on the front of the card as the card’s identity icon. Website URL is optional. If provided, it appears as a link on the back of the card. A live preview of the card appears on the right side of the screen as you fill in these fields.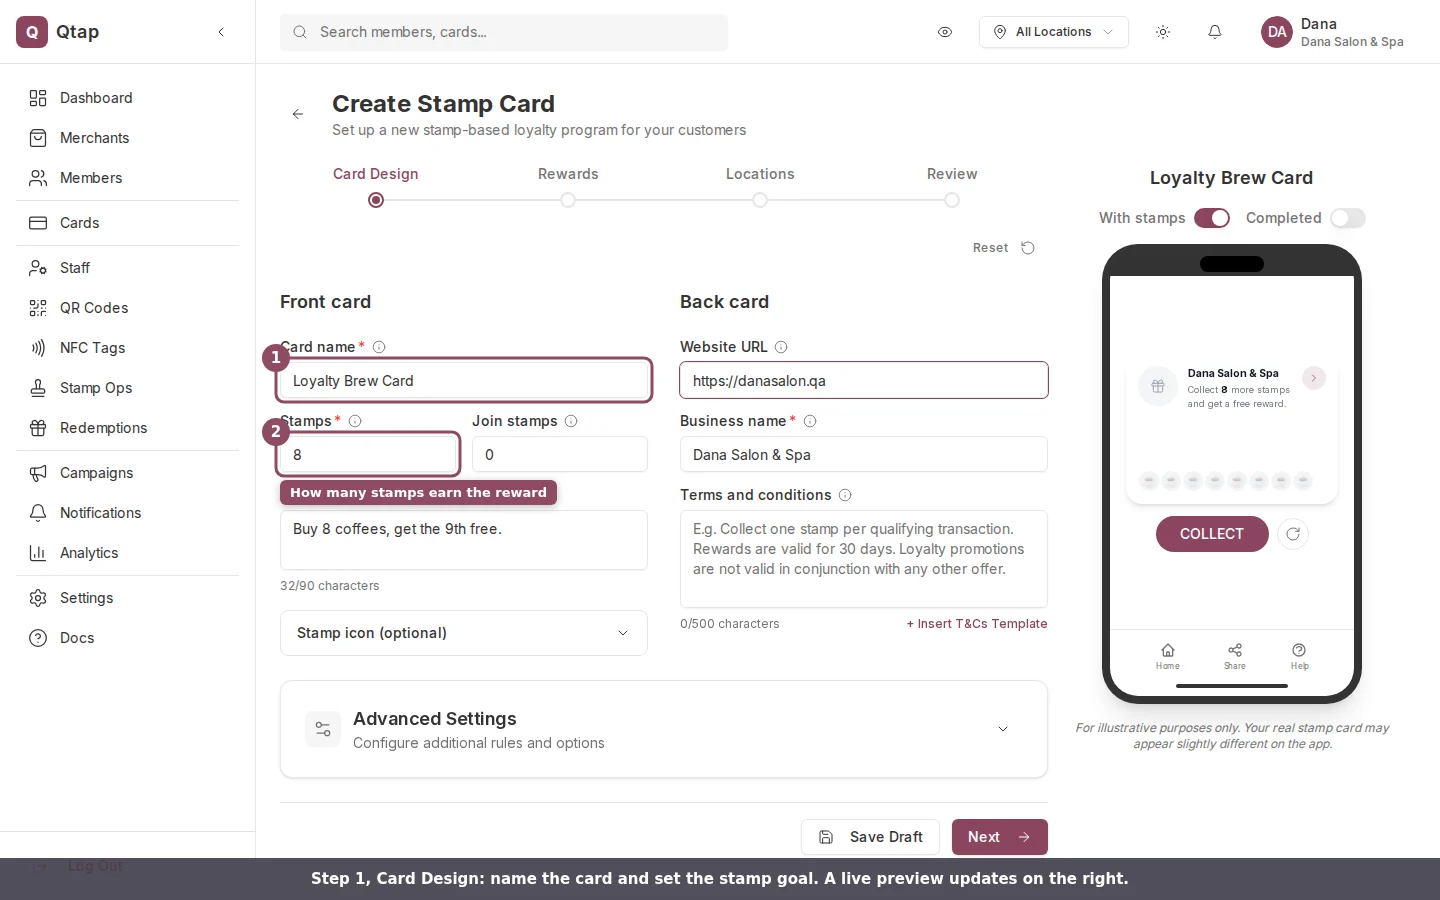
Step 1, Card Design: set the name and stamp goal while the preview updates on the right.
Step 2: Rewards
Every stamp card needs at least one Main reward before you can publish it. You can also add optional Sign Up and Interim rewards. Click Add Reward to open the reward editor.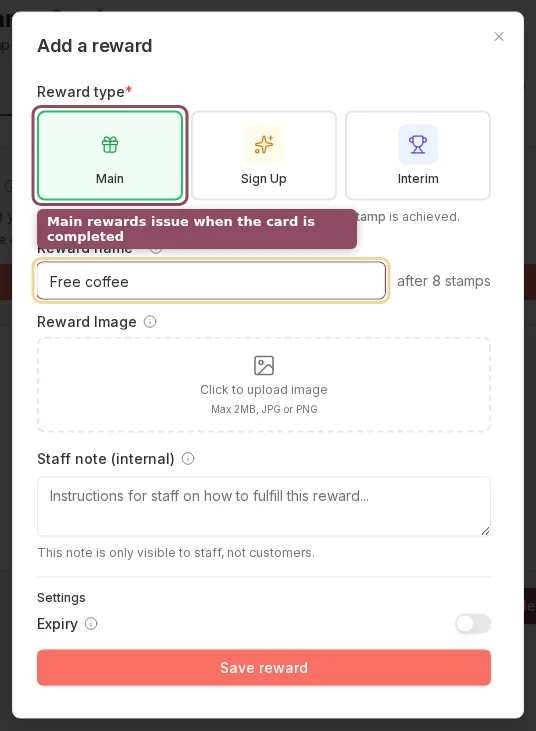
The reward editor: choose the reward type and give the reward a name.
- Main — issued automatically when the member completes the stamp goal
- Sign Up — issued when a customer joins the card for the first time
- Interim — issued at a specific stamp milestone you define (e.g., at stamp 5 on a 10-stamp card)
Step 3: Locations
Select which of your locations the stamp card is valid at. Members can only earn stamps at the locations you select here. If you have one location, it is selected automatically. If you have multiple locations, select all of them or choose a subset.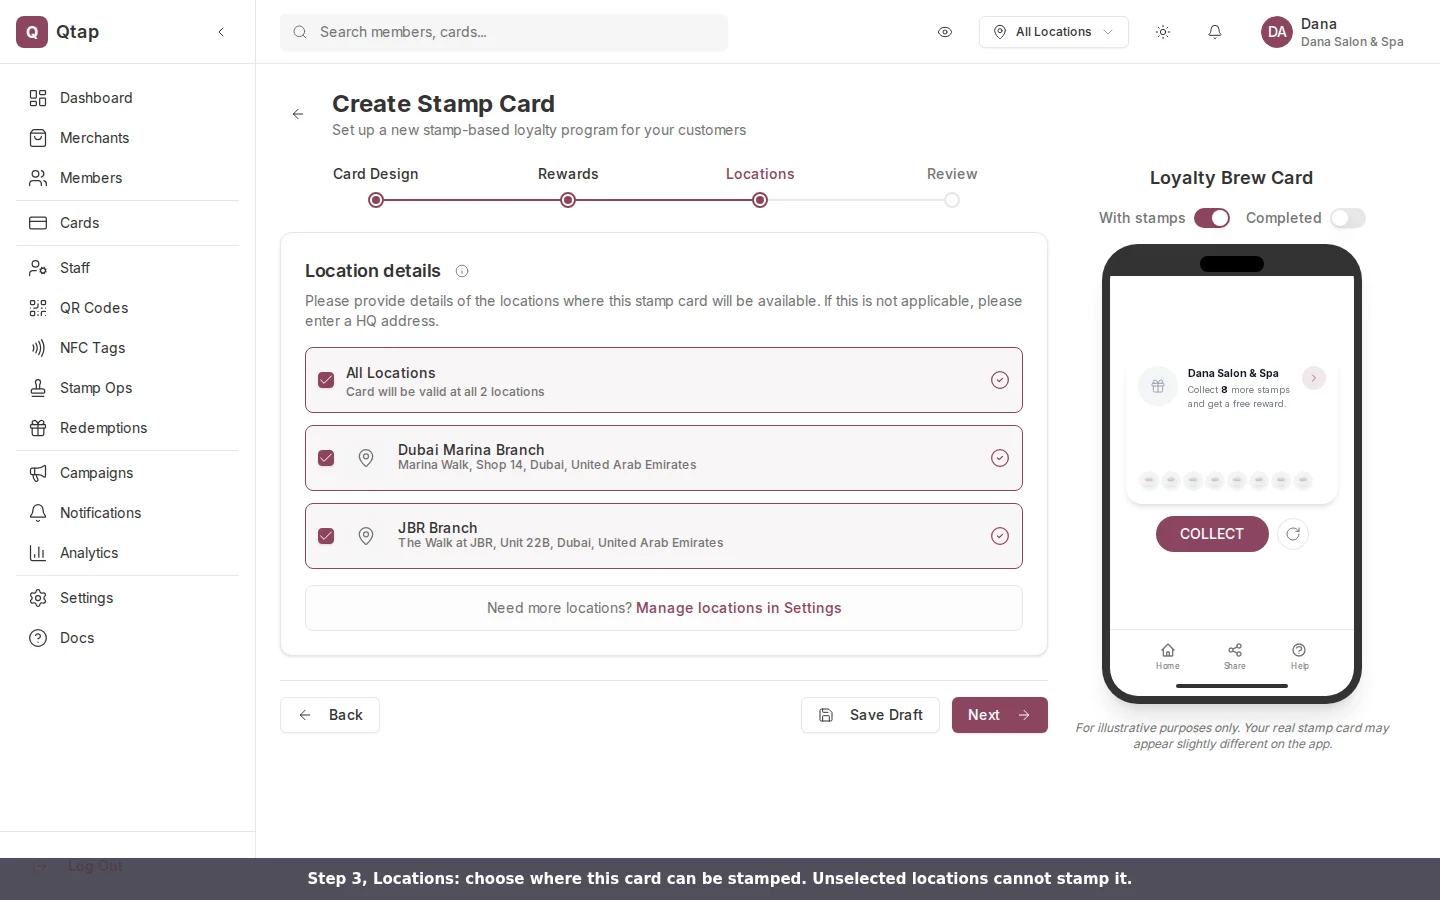
Step 3, Locations: pick which locations can stamp this card.
Step 4: Review
The Review step shows a summary of your card settings. Check that the stamp goal, rewards, and locations look correct.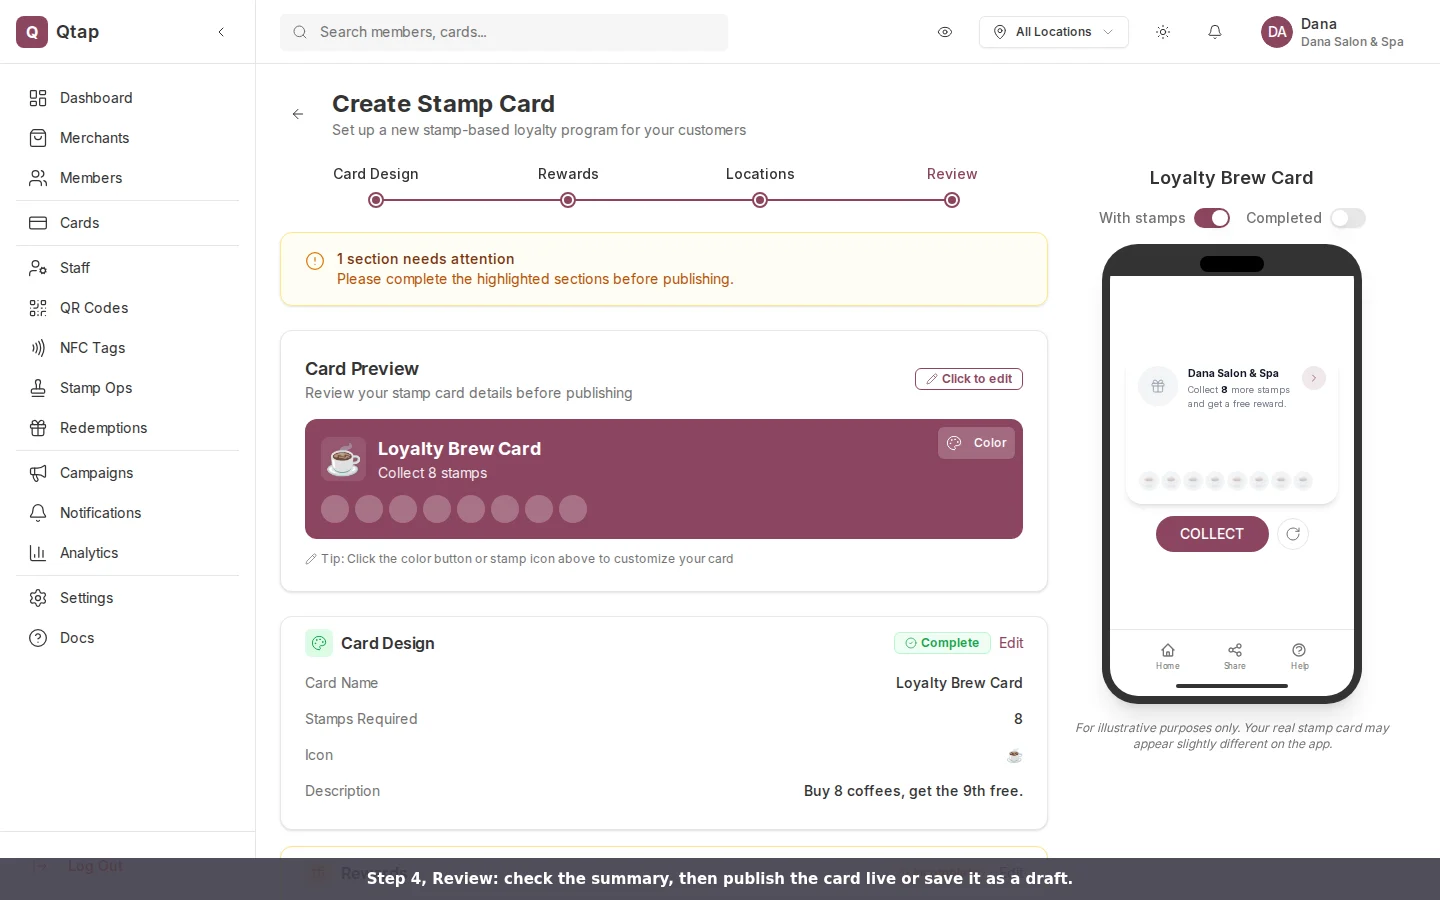
Step 4, Review: a summary of the card, with any incomplete sections flagged before publishing.
After publishing, the card status appears as Active on the Cards page. You can switch it to Inactive at any time to stop accepting new stamps without deleting the card.
Stamp Card Rewards
More detail on the three reward types and how they work
Designing Your Card
Customizing card colors, icons, and branding
Locations
Adding and managing your business locations