

Where to find them
Go to Cards in the sidebar and open a card with Create Card, or edit one you already have. On the first step, Card Design, scroll down to Advanced Settings and open it.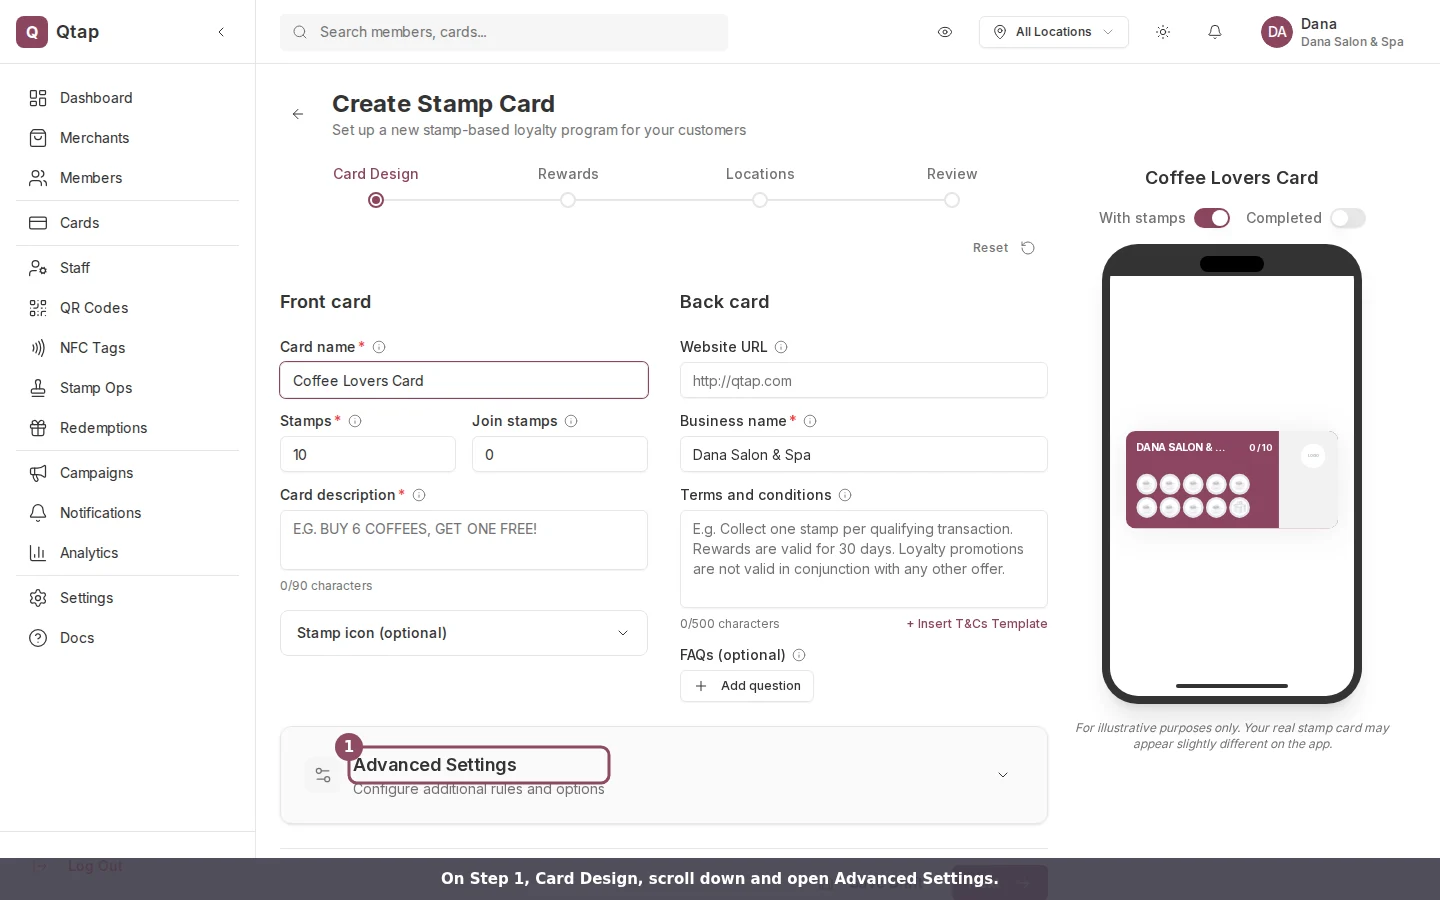
Advanced Settings sits below the Card Design form. Open it to reach the bonus stamp sliders.
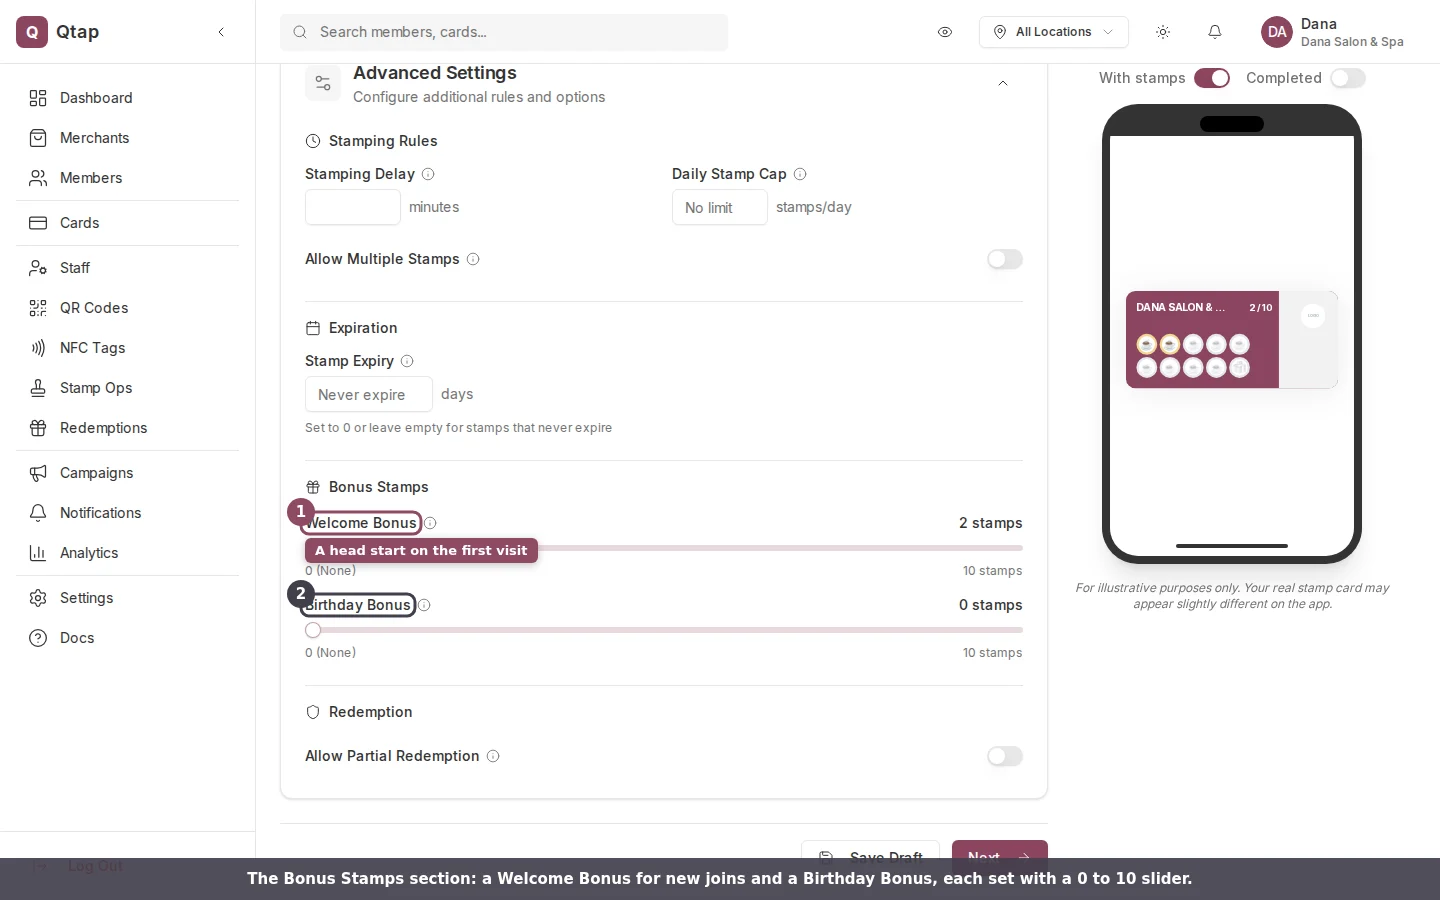
The Bonus Stamps section. The Welcome Bonus is set to 2, and the card preview on the right starts at 2 of 10.
Welcome Bonus
The Welcome Bonus gives new customers stamps the first time they join your card. Set it with the slider, and the card preview on the right updates to show the head start. This is the same setting as the Join stamps field at the top of the Card Design form, so changing one changes the other. Qtap adds these stamps automatically when a customer joins for the first time. A value of 2 is a good default: it gives a real head start without handing over the reward. A customer who sees 2 of 10 stamps already filled is far more likely to come back than one looking at an empty card.Birthday Bonus
The Birthday Bonus is the number of extra stamps you want to give a customer on their birthday. The customer needs a birthday saved on their member profile for it to apply, so this works best once you have profiles filled in.The Welcome Bonus is the one Qtap applies on its own. To actually deliver a birthday reward, run a Birthday campaign so the customer hears from you on the day, then add the stamps from Stamp Ops on their next visit.
Confirm and publish
Move through the wizard to the Review step. The Settings summary lists your Welcome Bonus and Birthday Bonus so you can check them before the card goes live.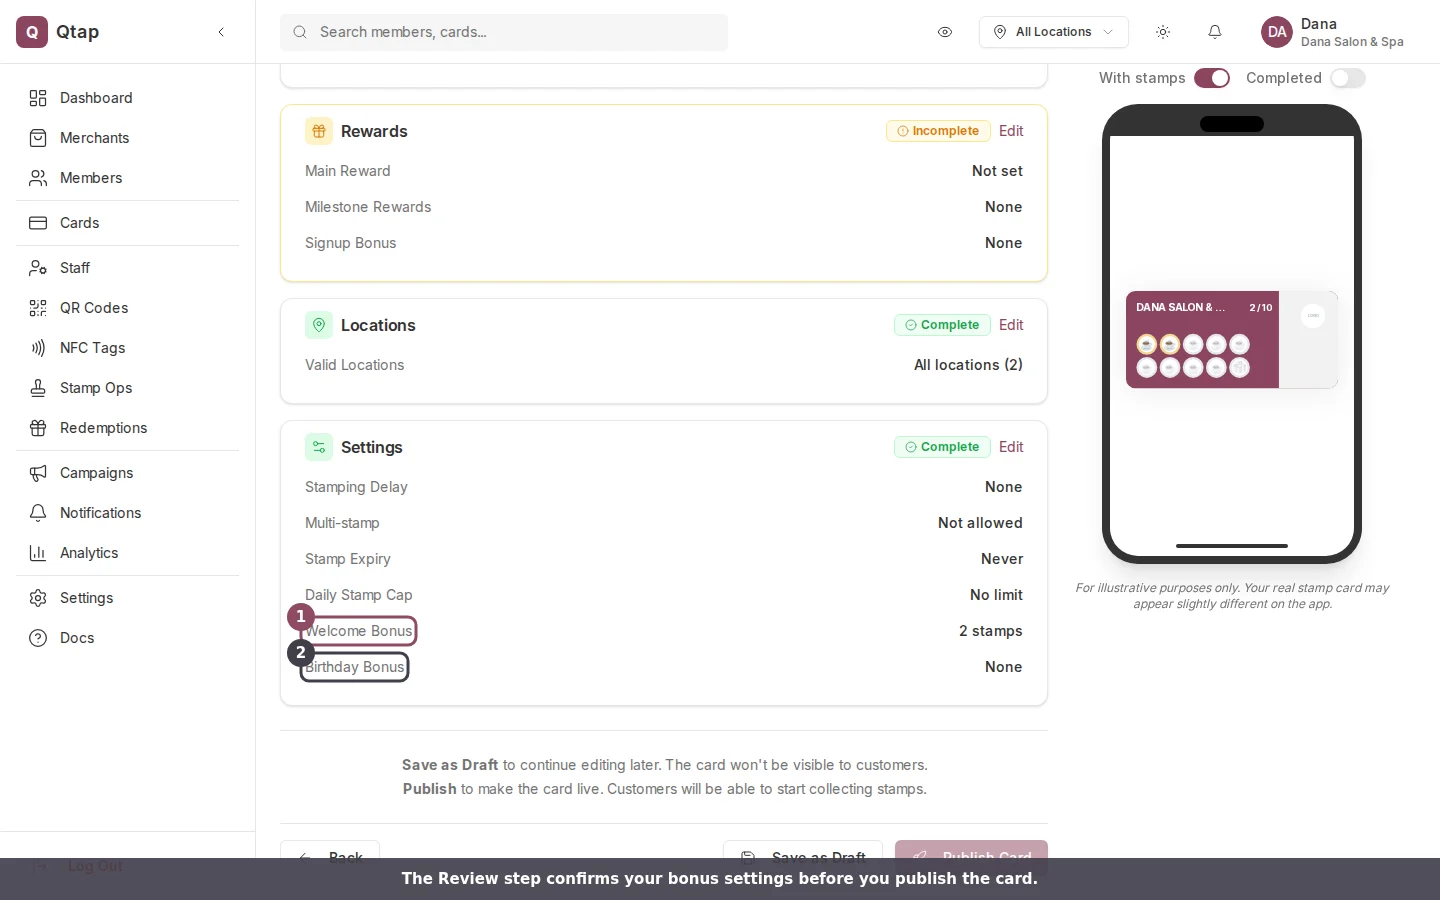
The Review step lists your bonus settings under Settings before you publish.
Designing Your Stamp Card
Every field in the Card Design step and Advanced Settings.
Birthday Campaigns
Reach customers with a message on their birthday.