

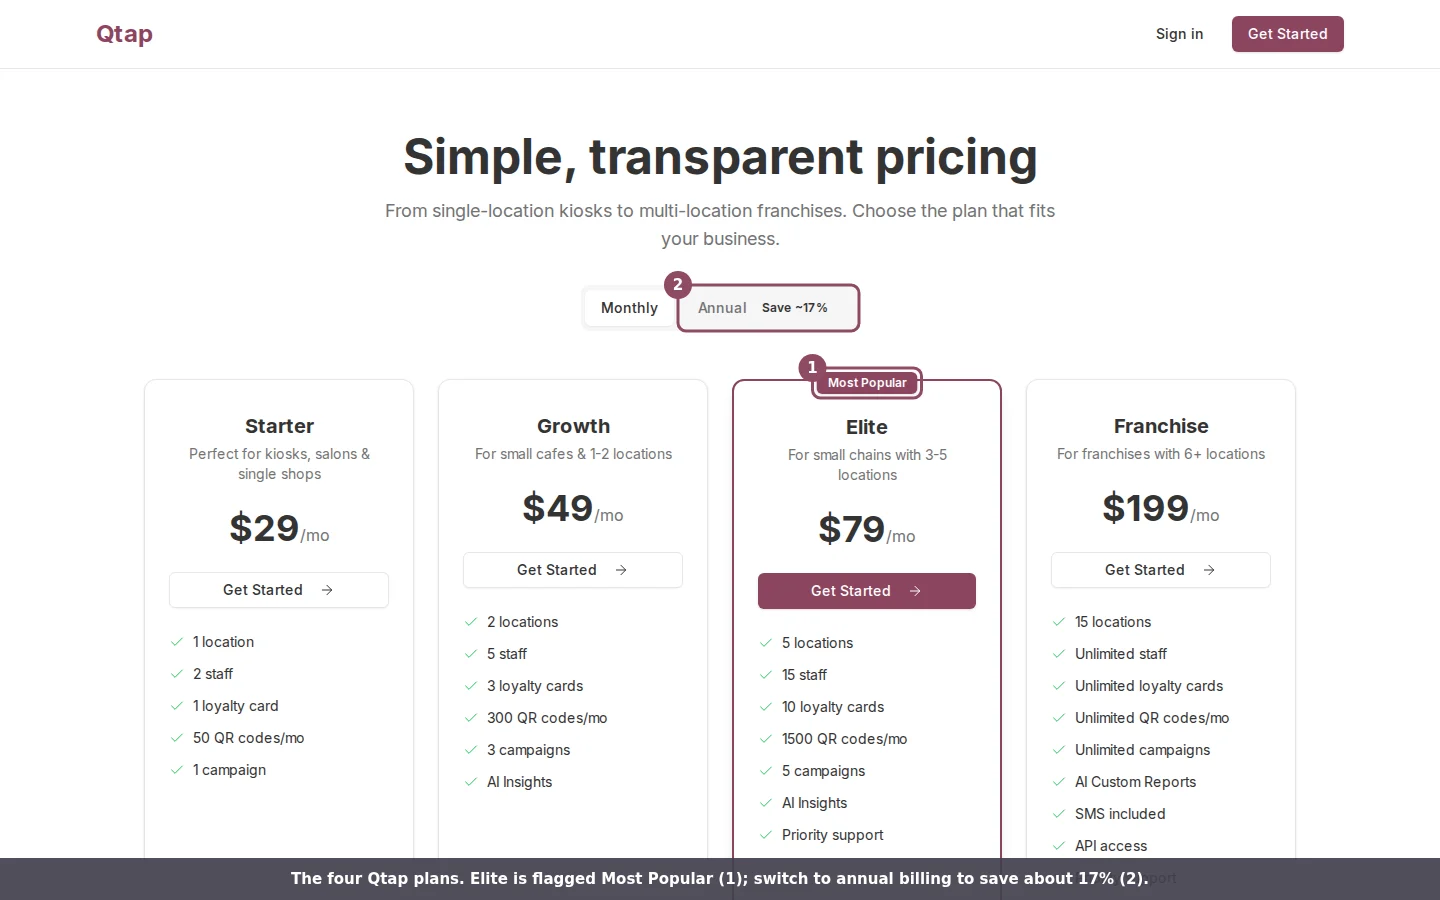
The four Qtap plans. Elite is the most common choice for a small chain.
What each plan includes
Points multipliers and unlimited members come with every plan, including Starter. The jump from Starter to Growth is where AI Insights, the full analytics view, and your Year in Review report turn on. SMS and API access stay exclusive to Franchise.
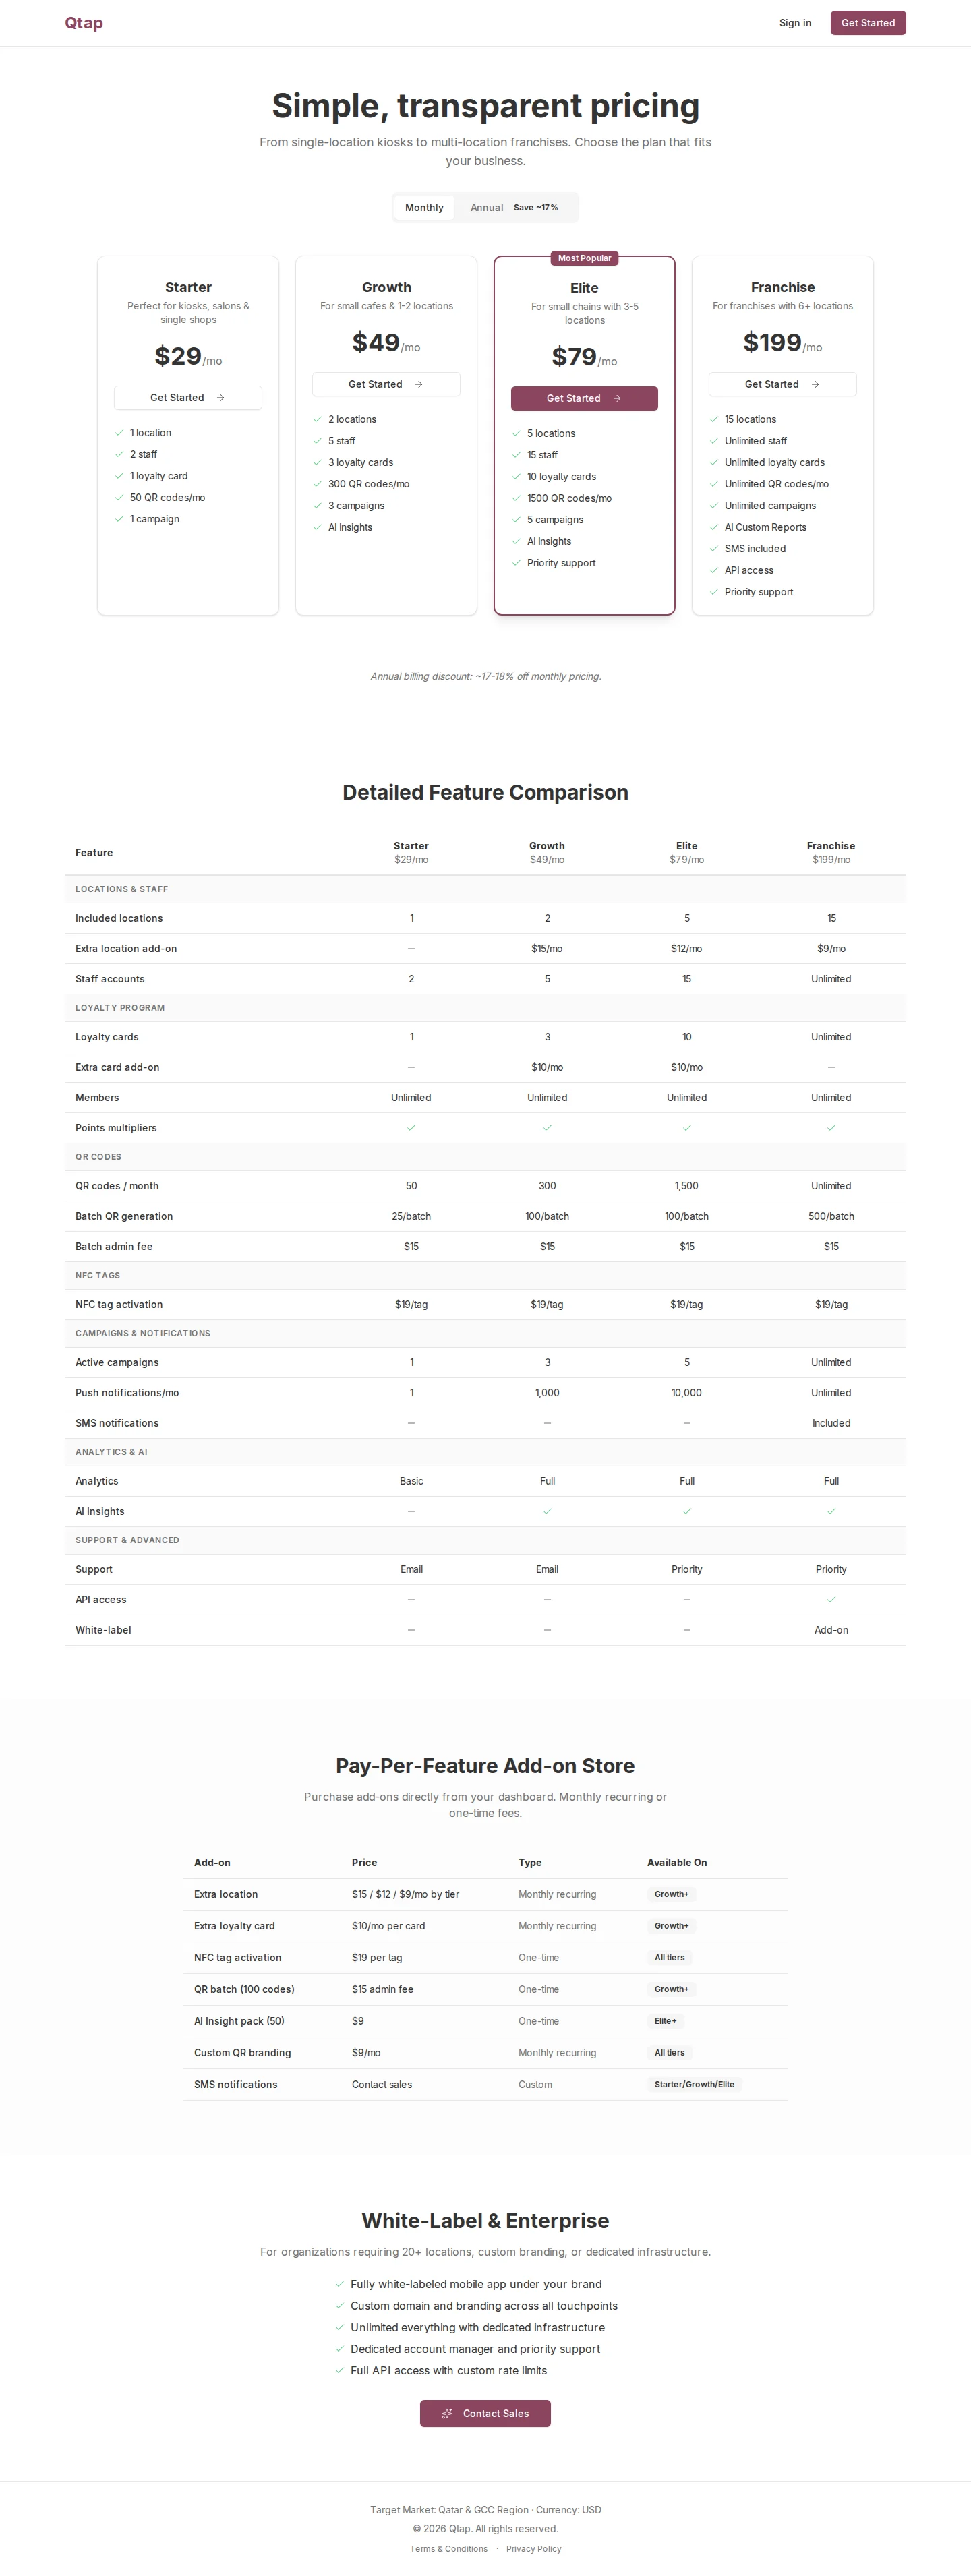
The full feature comparison on the public pricing page.
Which plan fits you
- Starter works for one shop with one loyalty card and a small team. One push notification a month means you send the occasional announcement, not a weekly campaign.
- Growth fits a cafe with one or two branches that wants to run real campaigns and track its numbers. The 1,000 monthly push notifications cover regular member outreach.
- Elite suits a small chain of three to five locations. You get more staff seats, ten loyalty cards, and priority support.
- Franchise is for six or more locations that need unlimited everything, SMS, and API access to connect Qtap to other systems.
Monthly or annual
Every plan has a monthly price and a lower annual price, billed as one payment for twelve months. Annual billing saves about 17% against paying month to month. You choose the billing interval when you pick a plan, and you can see both prices using the Monthly / Annual toggle on the pricing page and in the Plans tab.See your usage before you decide
Open Settings > Billing to see your current plan and how much of each limit you have used this month. Each meter fills as you add locations, staff, cards, QR codes, and campaigns, so you can tell whether you are close to needing the next tier.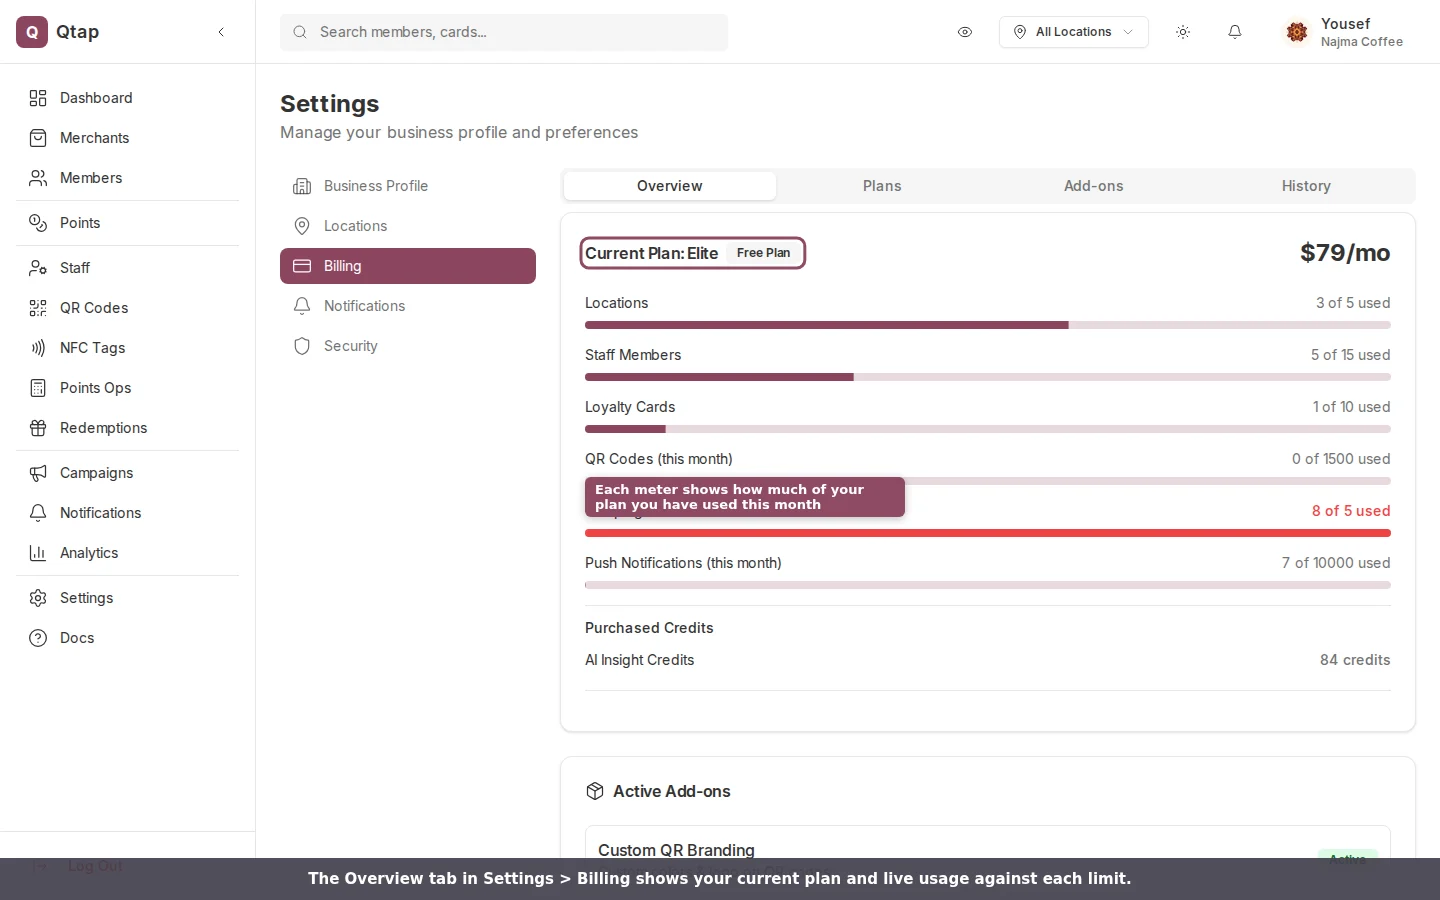
The Billing overview shows your plan and live usage against each limit.
Add-ons instead of upgrading
If you need a little more of one thing, you can buy it on its own from the Add-ons tab rather than moving up a whole plan.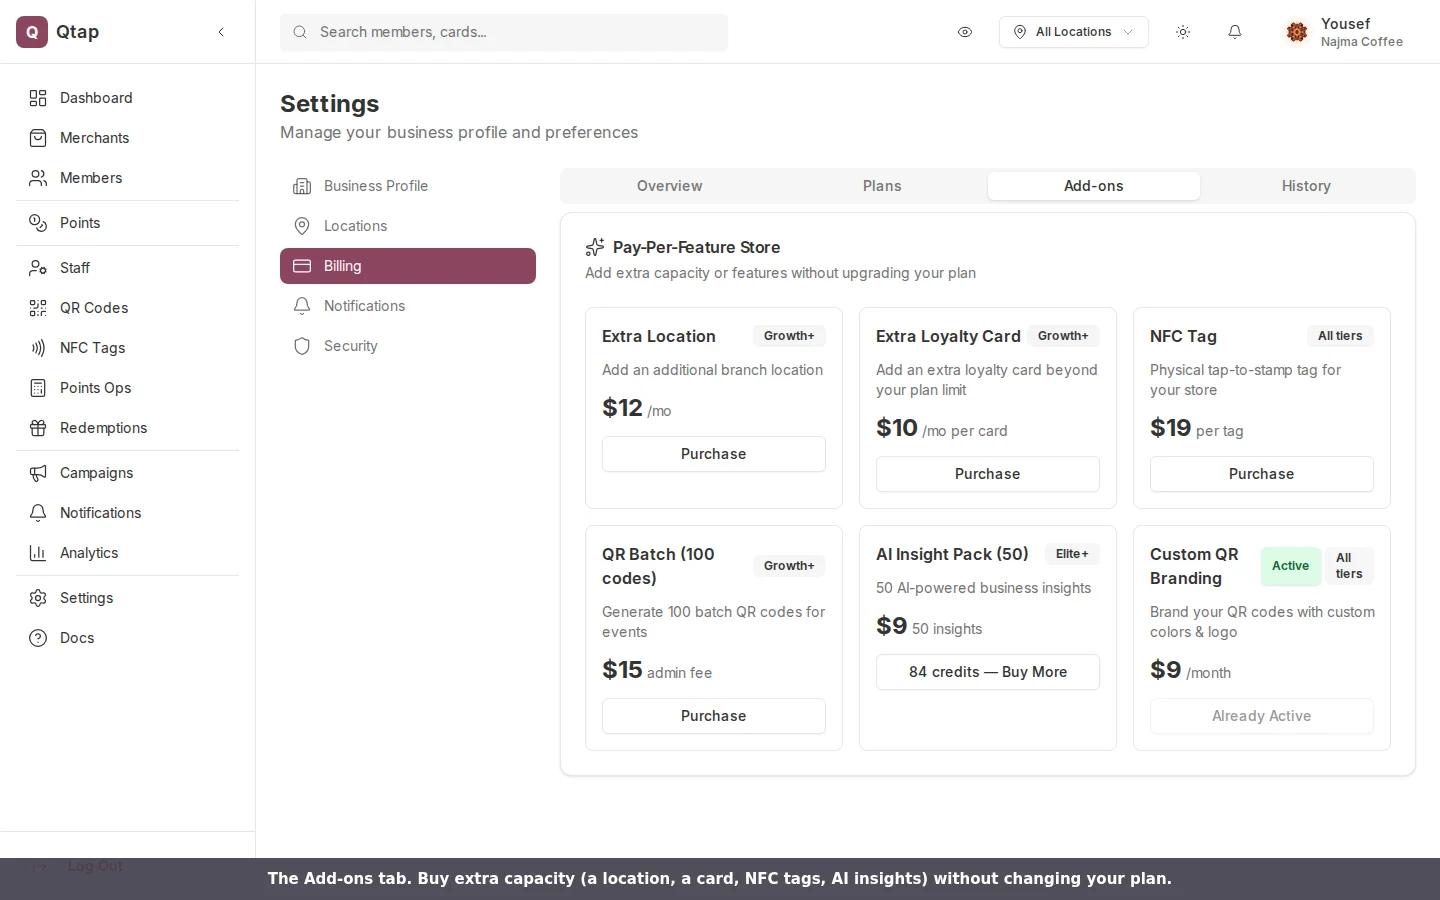
The Add-ons tab: buy extra capacity without changing your plan.
Changing your plan
The Plans tab in Settings > Billing is where you move up or down. Upgrades apply immediately and charge the prorated difference for the rest of the period. Downgrades check your usage first and ask you to reduce locations, staff, or cards if you are over the lower plan’s limit.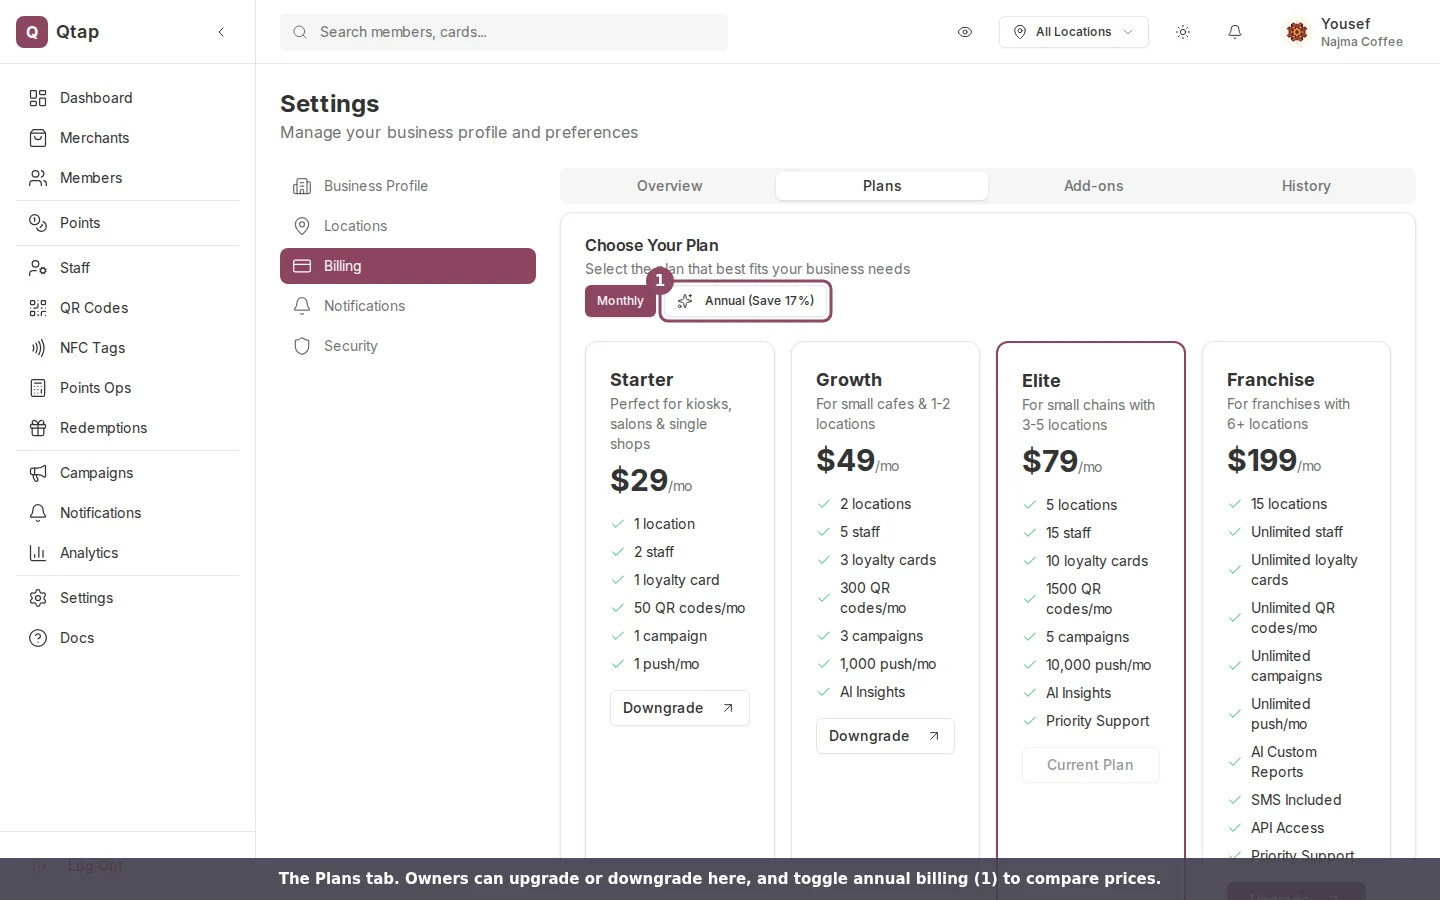
The Plans tab, where owners upgrade or downgrade.
Only the account owner can change the plan or buy add-ons. Managers and staff can view the plans but see a Contact Owner button instead of an upgrade button.
Billing
Upgrade, downgrade, buy add-ons, and manage invoices
Locations
Add and manage the locations your plan covers