


How each role sees branches, and who can open the NFC Tags page.
Assign branches when you invite someone
Branch assignment is part of the invite. On the Staff page, choose Invite Staff, fill in the teammate’s details, and find the Assigned Locations section. All Locations is on by default, which lets the new teammate see and work at every branch. Turn it off to show your branch list, then tick the branches they should have.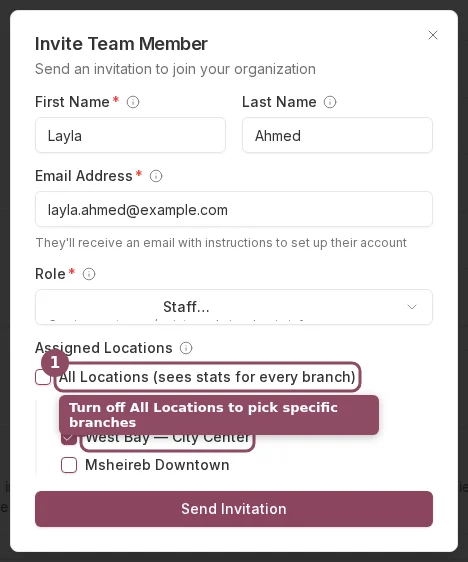
Turn off All Locations in the invite form, then pick the branches this teammate works at.
Change a teammate’s branches later
You can adjust this any time. On the Staff page, open the menu on the teammate’s row and choose Edit Permissions, then open the Locations tab. Turn off Access to All Locations, tick the branches they work at, and choose Save Changes.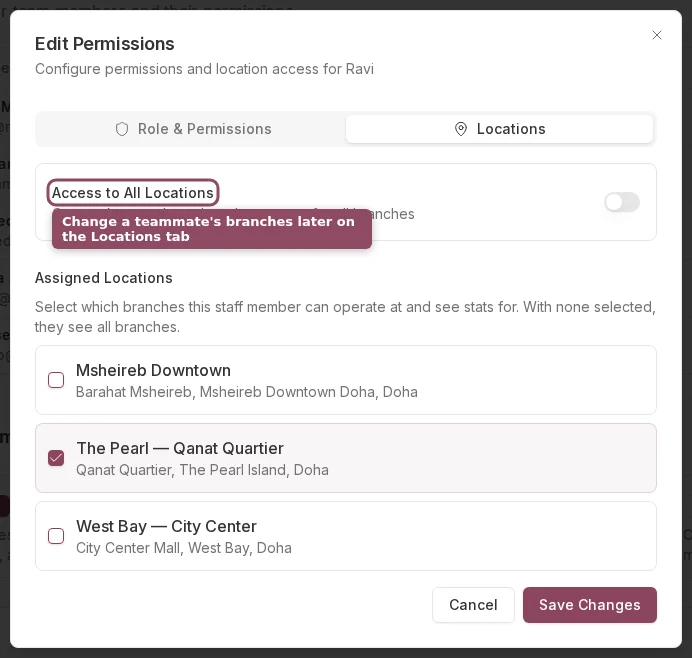
The Locations tab in Edit Permissions. Turn off Access to All Locations to assign specific branches.
What multi-branch staff see when they issue
When a staff member is tied to two or more branches, Qtap asks them to pick where they are before they can issue anything. On the Stamp Operations or Points Operations screen a Branch field appears, prompting them to select the branch they are working at. Until they choose, the issue button stays greyed out and a line reads “Choose the branch you’re working at to continue.”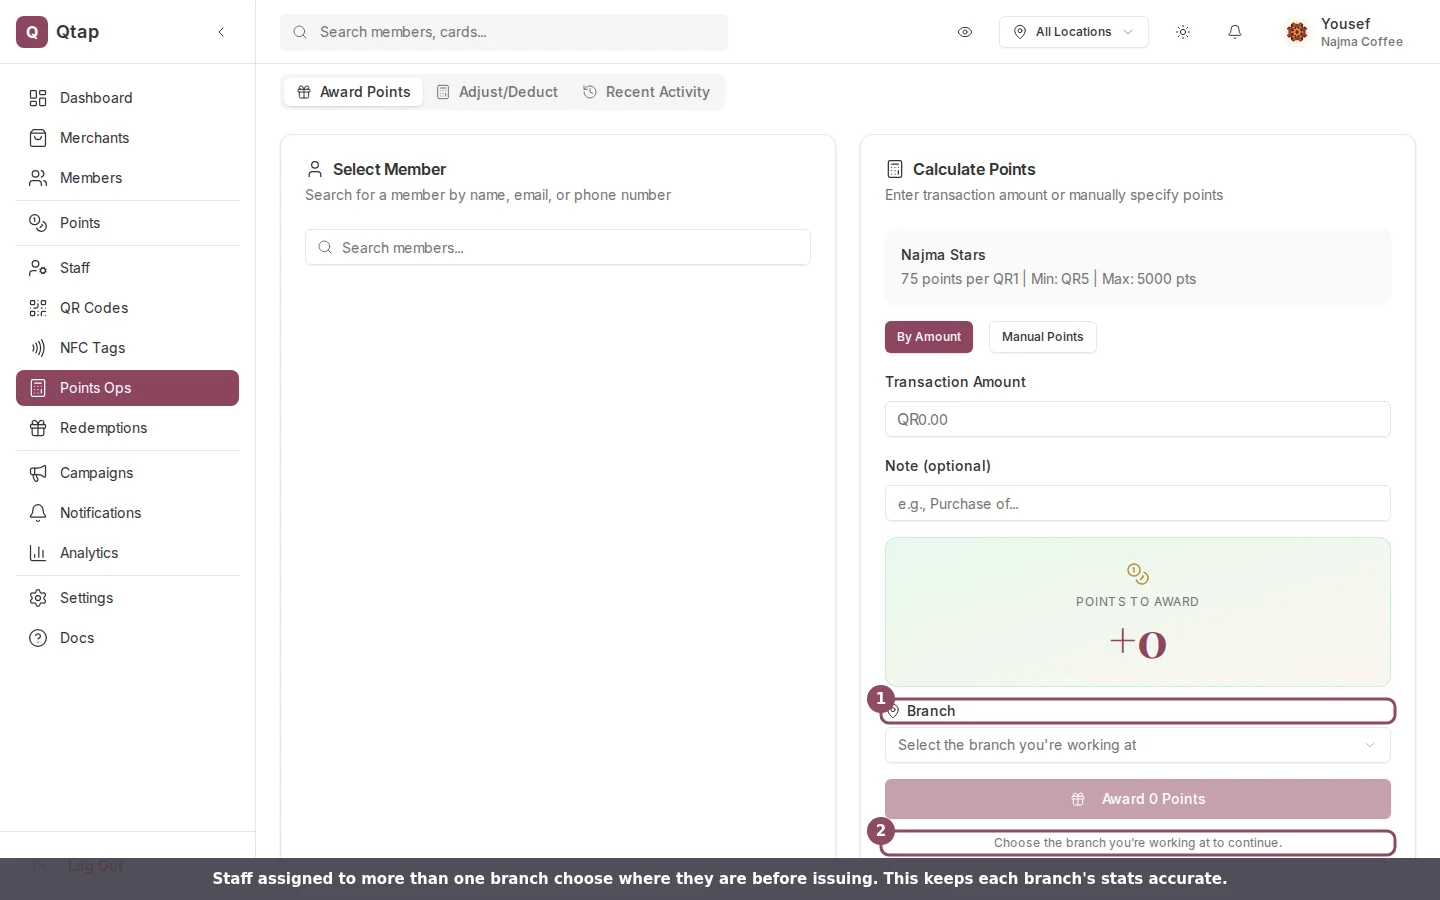
On a multi-branch account, staff pick their branch before issuing. The button stays greyed out until they do.
Staff cannot open NFC Tags
Roles and Permissions
What each role can do, and how to set custom permissions
Inviting a Team Member
The full invite journey from sending it to the teammate joining